
The “Order Management Settings” page
The Order Management Settings page provides the configuration options needed to manage the order workflow, customer notifications, and invoice settings.
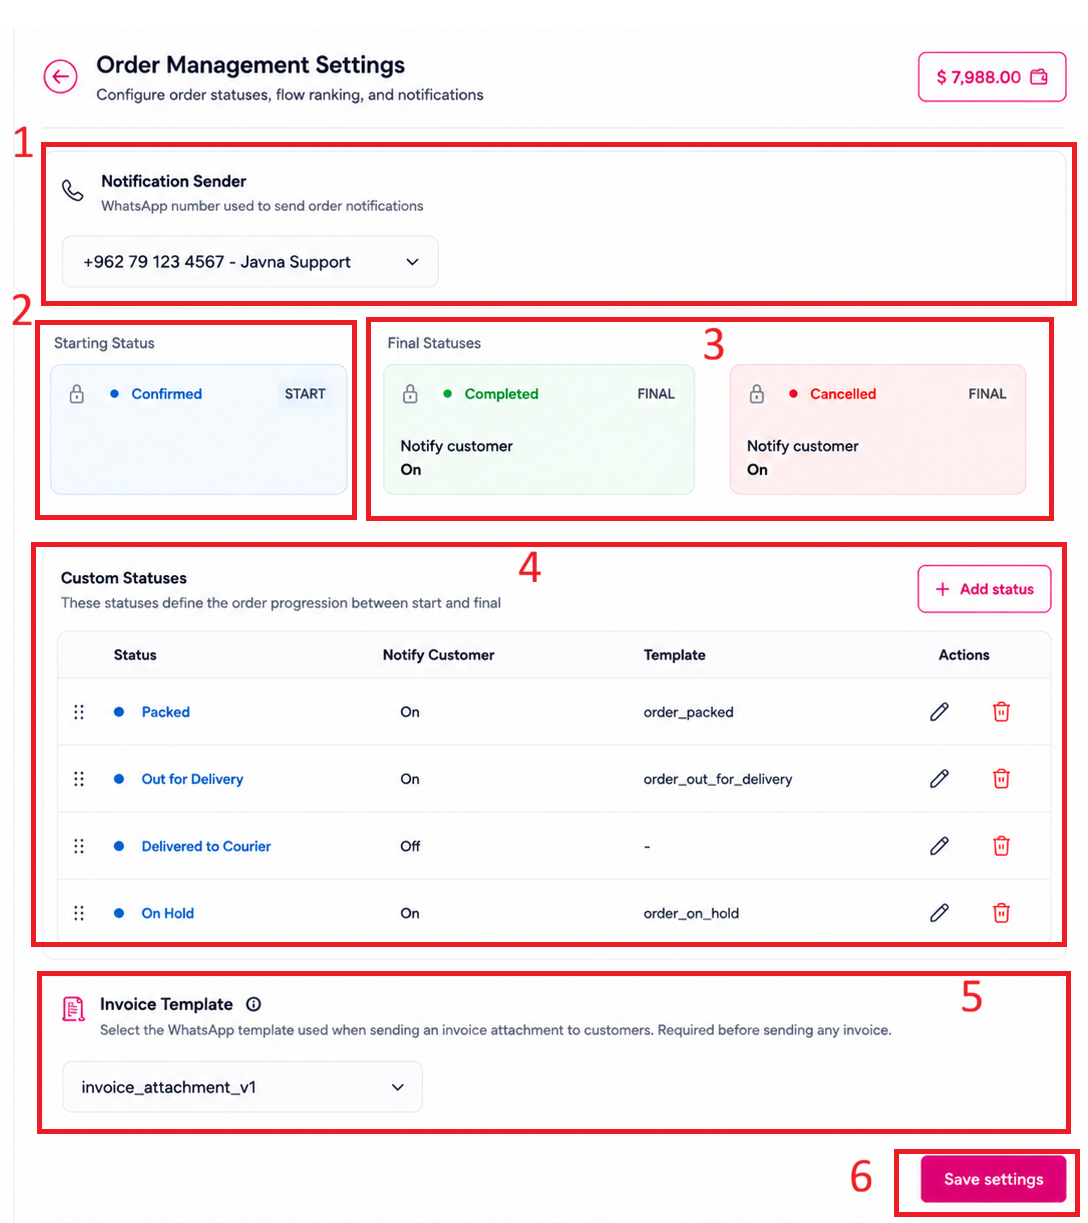
The components of order management settings
1. Notification Sender
This section allows you to select the WhatsApp number used to send customer order notifications and invoice messages.
Only WhatsApp numbers connected through the Phone Numbers settings are available for selection. Each option displays the phone number and display name to help you choose the correct sender.
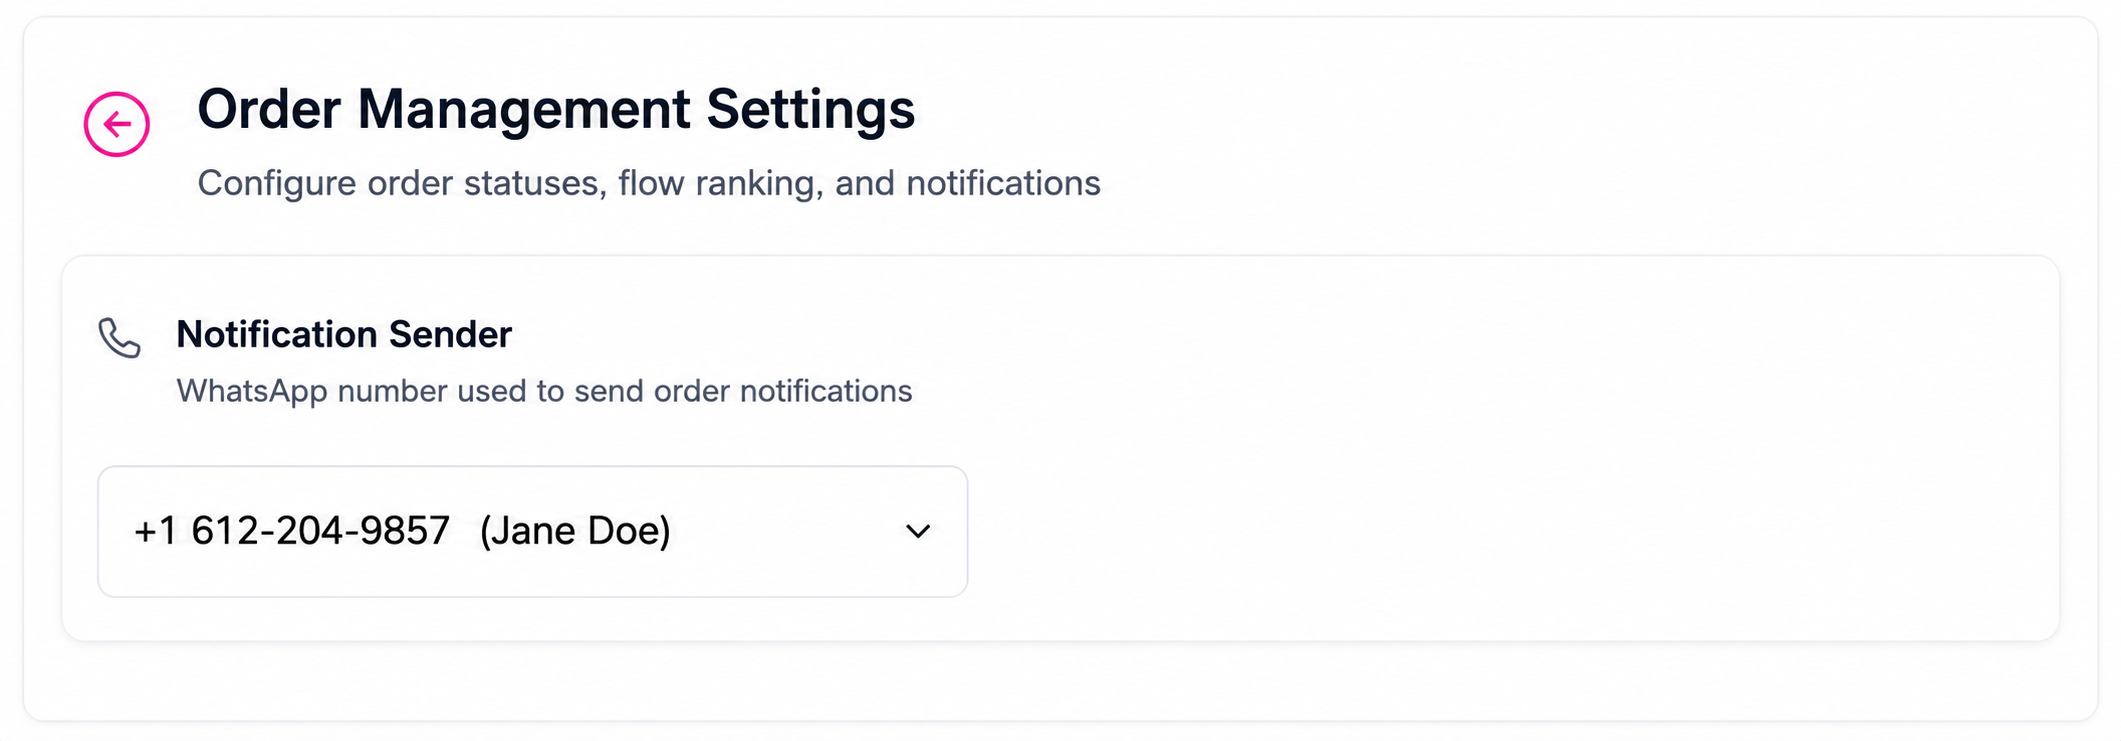
Notification Sender.
Note: If only one WhatsApp number is connected, it is selected automatically by default. The selected sender number appears at the top of the Order Management Settings page.
You can change the sender number at any time. Changes apply to all future order notifications and invoice messages, while previously sent messages remain unchanged.
2. Starting Status
Displays the default starting status for newly created orders. This represents the first stage in the order lifecycle.
3. Final Statuses
Displays the final order statuses that indicate the completion or termination of an order:
| Status | Description |
|---|---|
| Completed | The order has been successfully fulfilled. |
| Cancelled | Can be selected from any active non-final order status when the order needs to be stopped before completion. |
- Once an order reaches its final status, no further status changes are allowed.
- For each final status, you can enable or disable customer notifications and assign a WhatsApp message template.
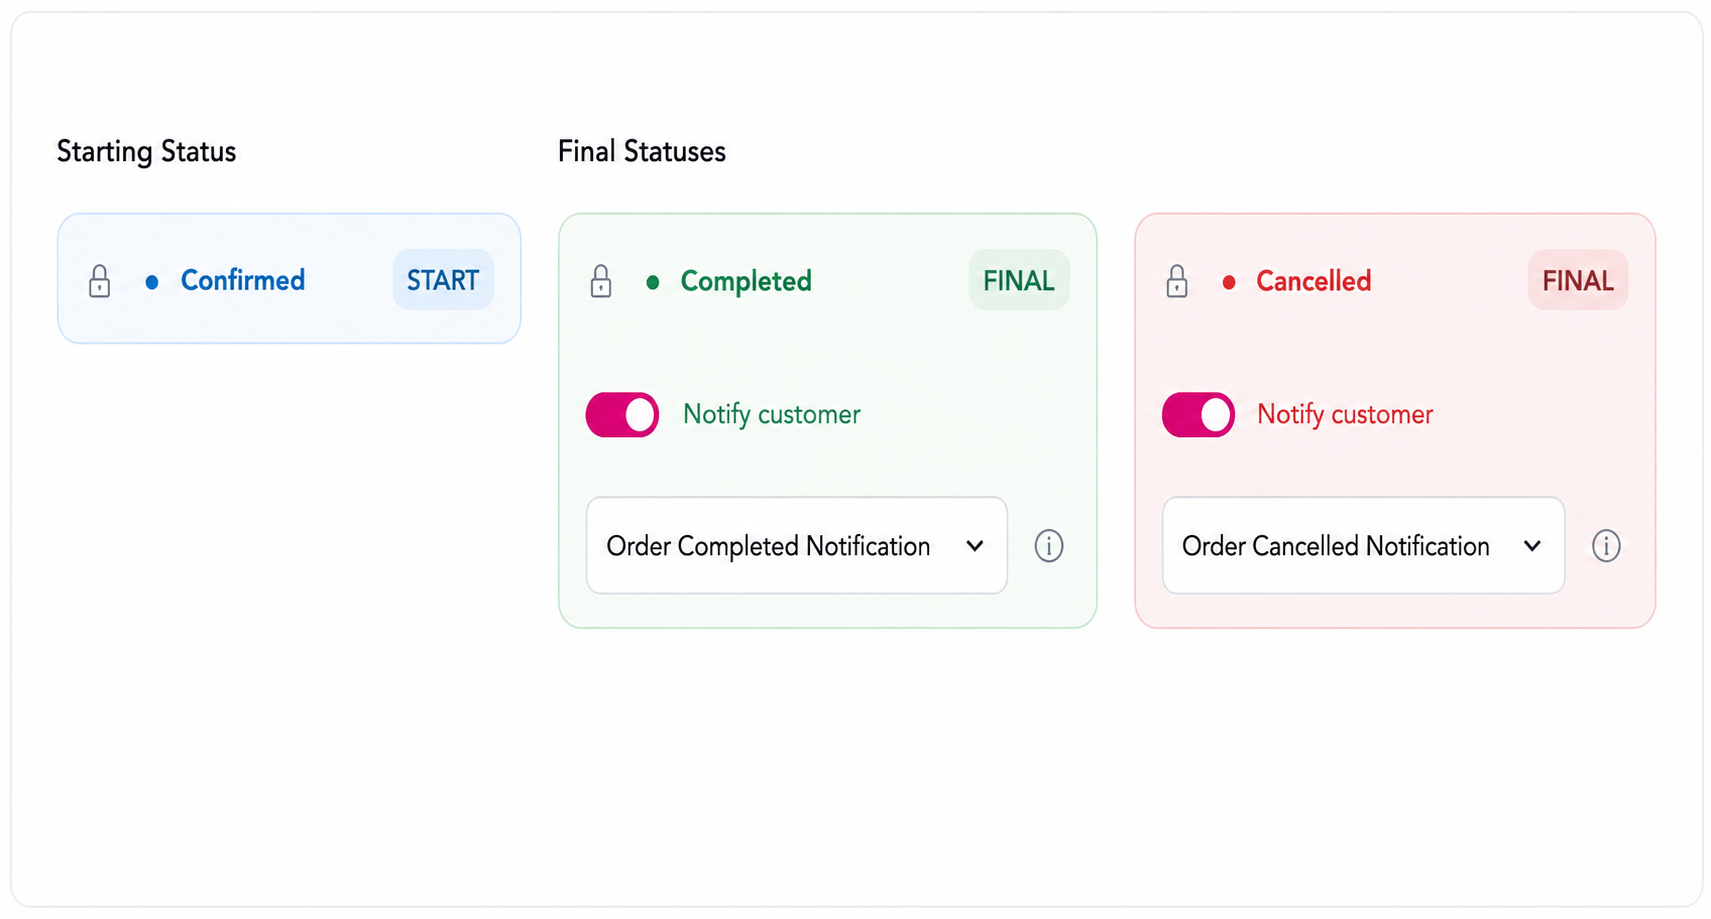
Starting status and final status.
4. Custom Statuses
This section allows you to create and manage custom intermediate order statuses that match your business workflow, such as Packed or Out for Delivery.
For each custom status, you can configure:
- Enable or disable customer notifications
- Select a WhatsApp message template
Note: Only static templates without variables or placeholders are supported.
- Edit the status name in English and Arabic
Adding a Custom Status
Follow these steps to create a new custom order status:
- In the Custom Statuses section, click + Add Status.
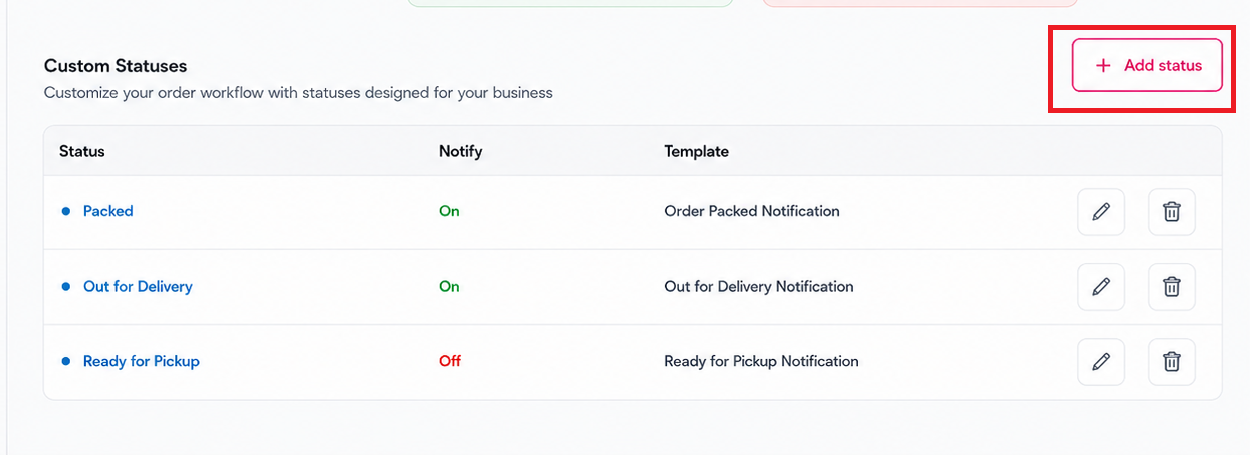
The "Add status" button.
- In the Add Status popup:
-
Enter the Status Name (English)
-
Enter the Status Name (Arabic)
Note: Both English and Arabic status names are required.
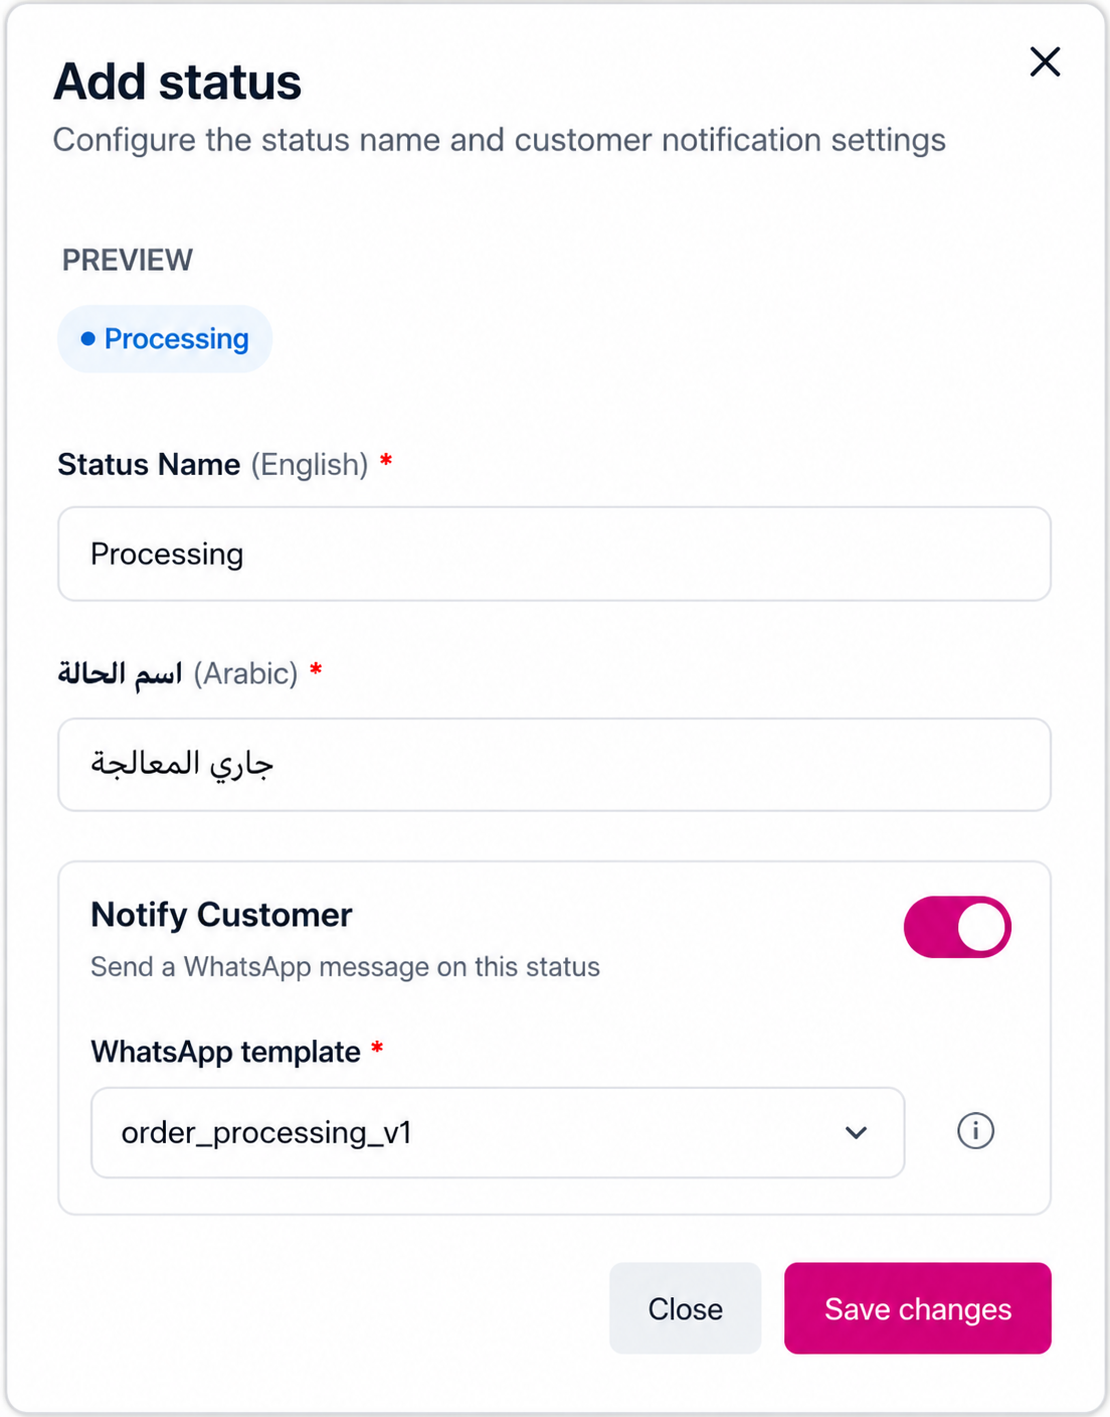
The "Add Status" popup
-
(Optional) Enable Notify Customer if you want customers to receive a WhatsApp notification when the order reaches this status.
-
If notifications are enabled, select the appropriate WhatsApp notification template.
-
Click Save Changes to create the new status.
-
After saving, the new status appears in the Custom Statuses table, where you can:
- View the status name and notification setting
- Use Edit to update the status settings
- Use Delete to remove unused statuses
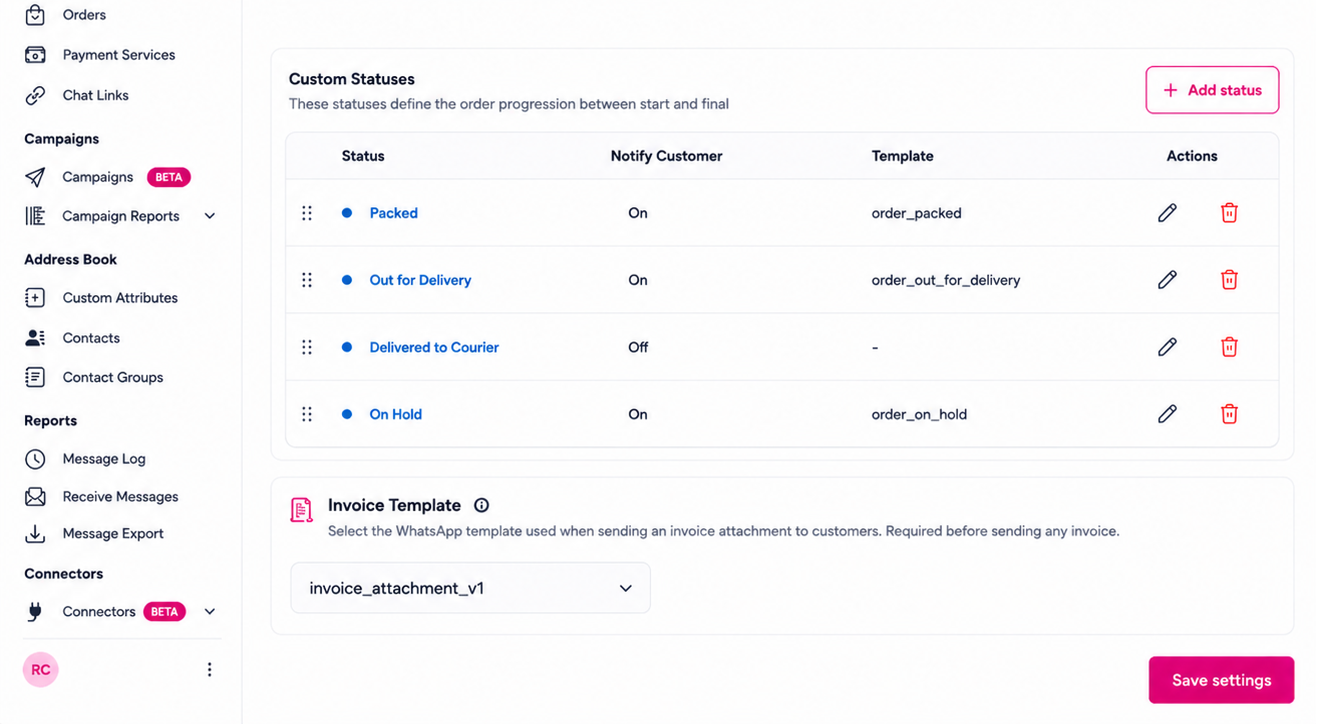
The "custom statuses" table.
Important Notes:
- Unused statuses can be deleted; however, statuses already used in existing orders cannot be removed.
- System-defined statuses such as Confirmed, Completed, and Cancelled are locked and cannot be deleted or reordered.
5. Invoice Template
You can assign a dedicated WhatsApp document template for invoice delivery, ensuring invoices are sent using a consistent and approved message format.
6. Save Settings
Saves all changes made to the Order Management configuration.
After saving, a confirmation message appears: "Settings saved successfully."
Updated 12 days ago