Adding a new webhook
To add a new webhook, follow these steps:
- Navigate to the “Webhook Settings” page. Refer to this section "Navigating to the "Webhook Settings" page".
- Click on the “Add Webhook” button.
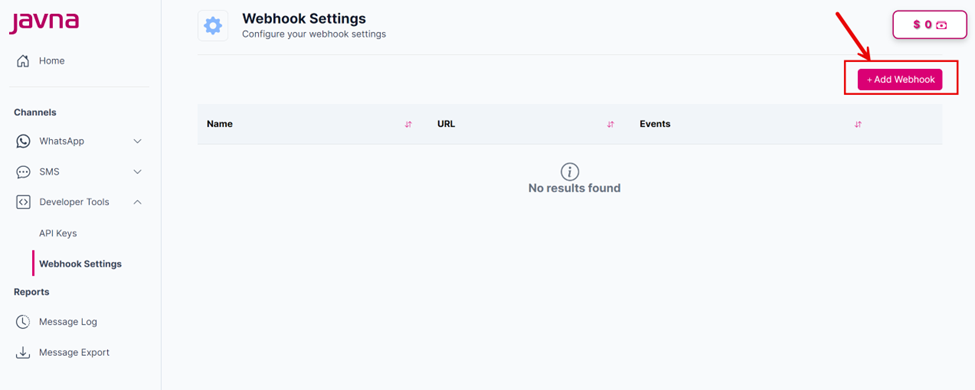
The "Add Webhook" button.
- You will be redirected to the “Add webhook” page.
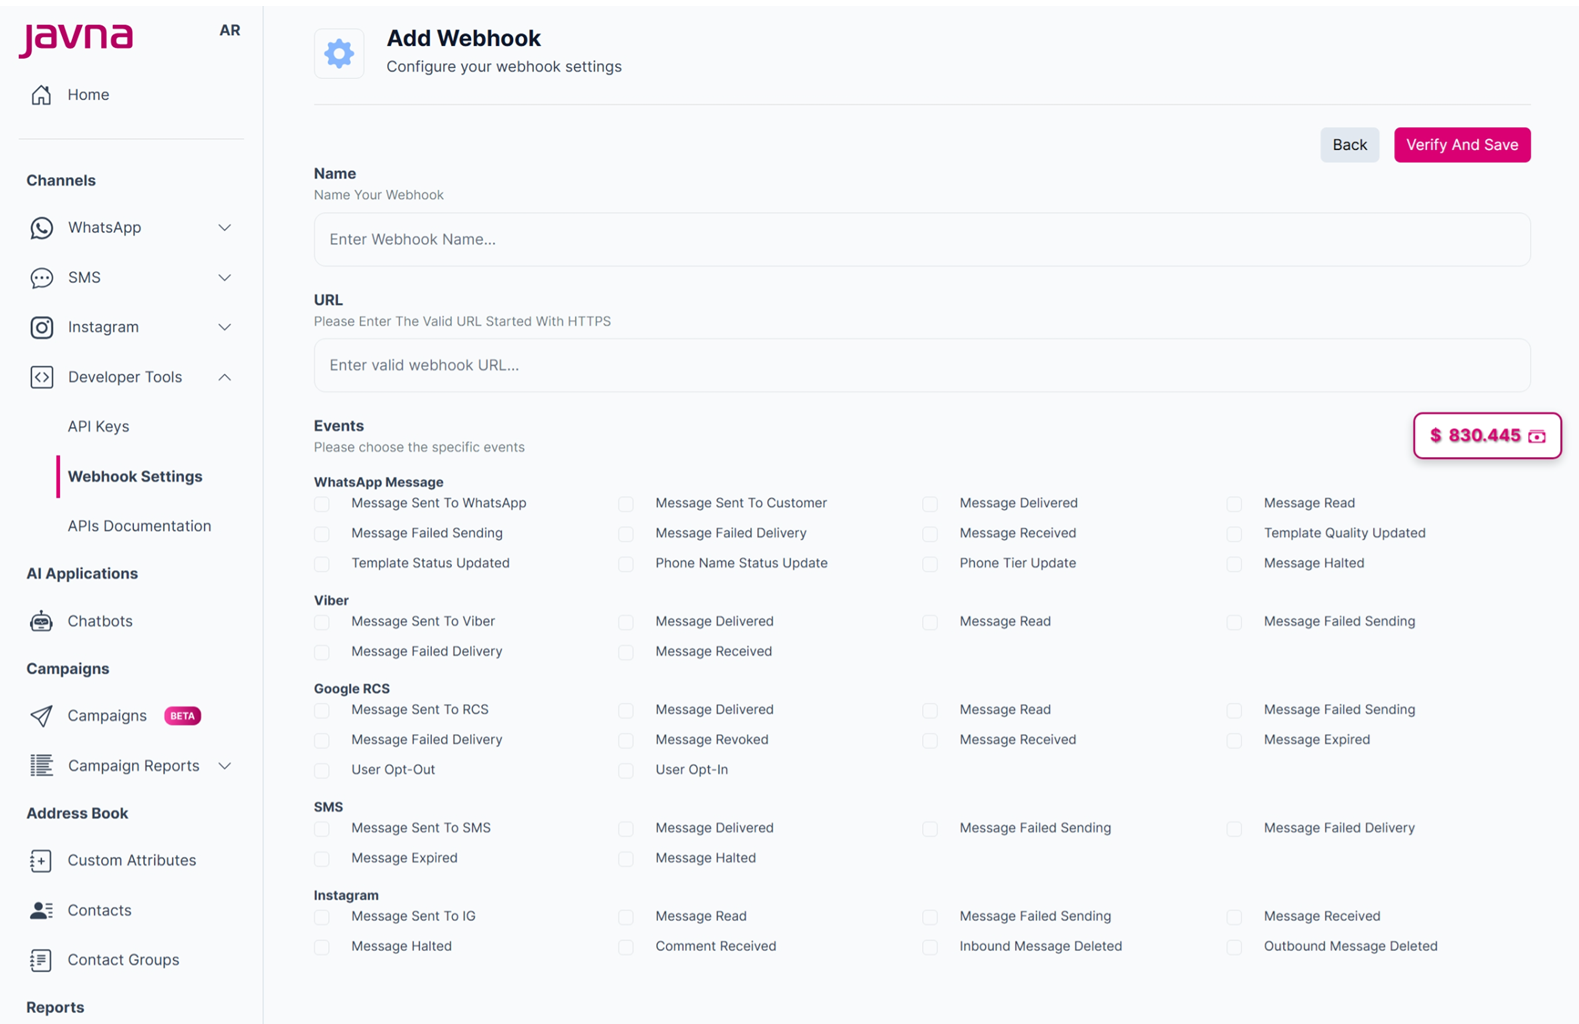
The "Add Webhook" page
- Enter a descriptive name that reflects the purpose, or the events associated with the webhook.
- Enter a valid URL that starts with HTTPS. This is where the webhook will send its updates.
- Choose the types of events for which you want to receive notification payloads. You can select one or more of the following options:
a. WhatsApp Message:

The "WhatsApp Message" options.
b. Viber
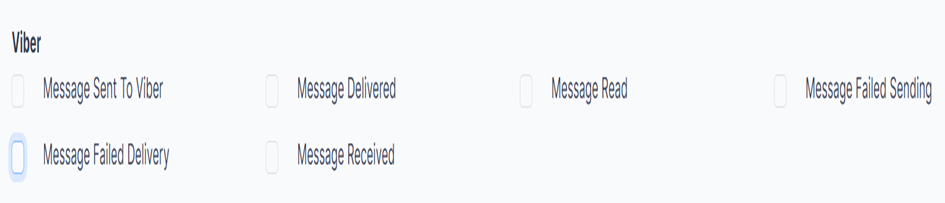
The "Viber" options.
c. Google RCS:

The "Google RCS" options.
d. SMS:

The "SMS" options.
e. Instagram

The "Instagram" Options
- Click on the “Verify and Save” button, then a confirmation message will appear to indicate that the webhook has been successfully added.
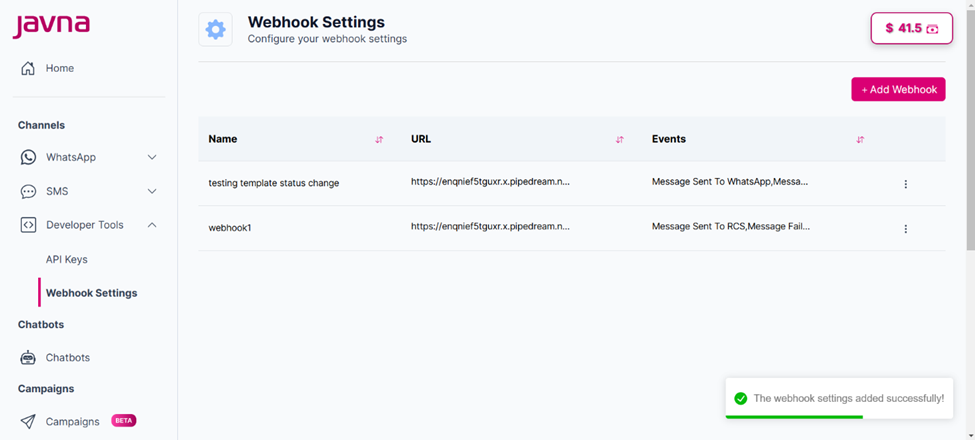
A confirmation message is appearing to indicate that the webhook has been successfully added.
Notes:
- When you add a webhook for the first time, a POST request will be sent to the webhook URL. If the endpoint does not return a successful (200 OK) HTTP response within 5 seconds, the URL will be deemed invalid, and an error message will indicate that it is invalid, displaying "URL Non Ok Status!". Additionally, a POST request will be sent whenever you edit the webhook.
- You can add multiple webhooks to the same channel, using either the same events or different events according to your preference.