
Setting Up Payment Providers
The Payment Settings page allows you to configure and manage your payment providers and payment methods. You can connect supported payment providers, select available payment methods, and manage your configurations.
Multiple payment gateways can be connected, provided you have active accounts with the selected payment providers.
First-time users: You must configure payment gateways and connect your payment providers before viewing transactions on the CPaaS platform.
Follow these steps to set up your payment providers:
- Navigate to the Payment Services page. Refer to (Navigation to the "Payment Service" page) section.
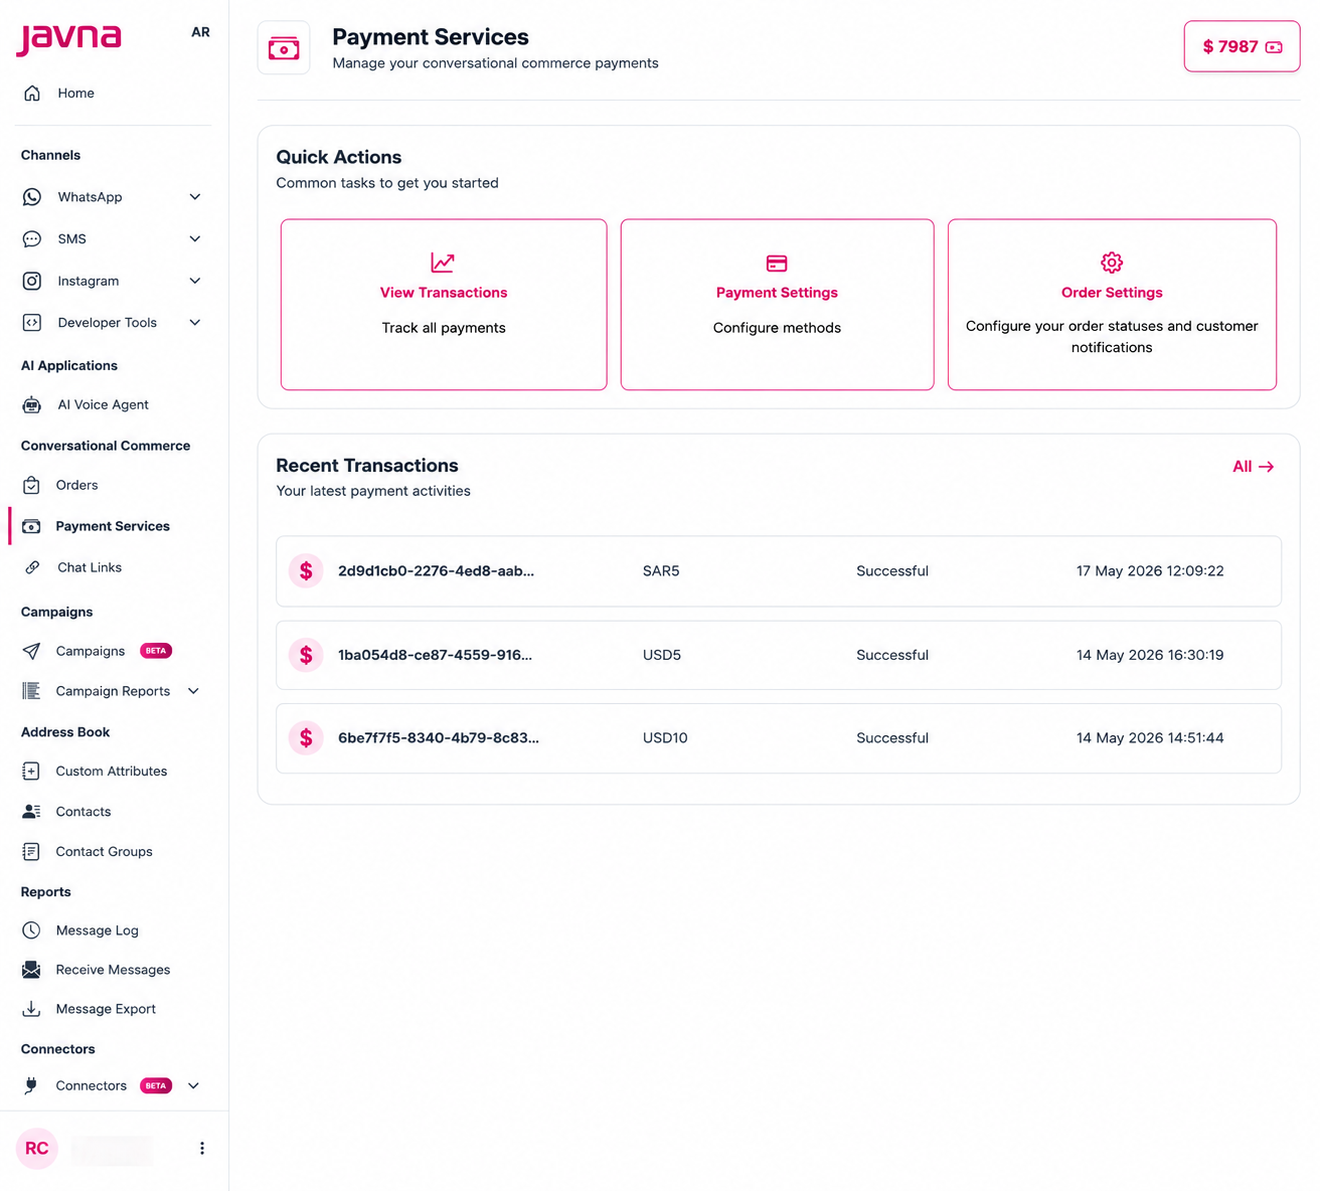
The payment service page
- Click on the Payment Settings card. You will be redirected to the Payment Settings page.
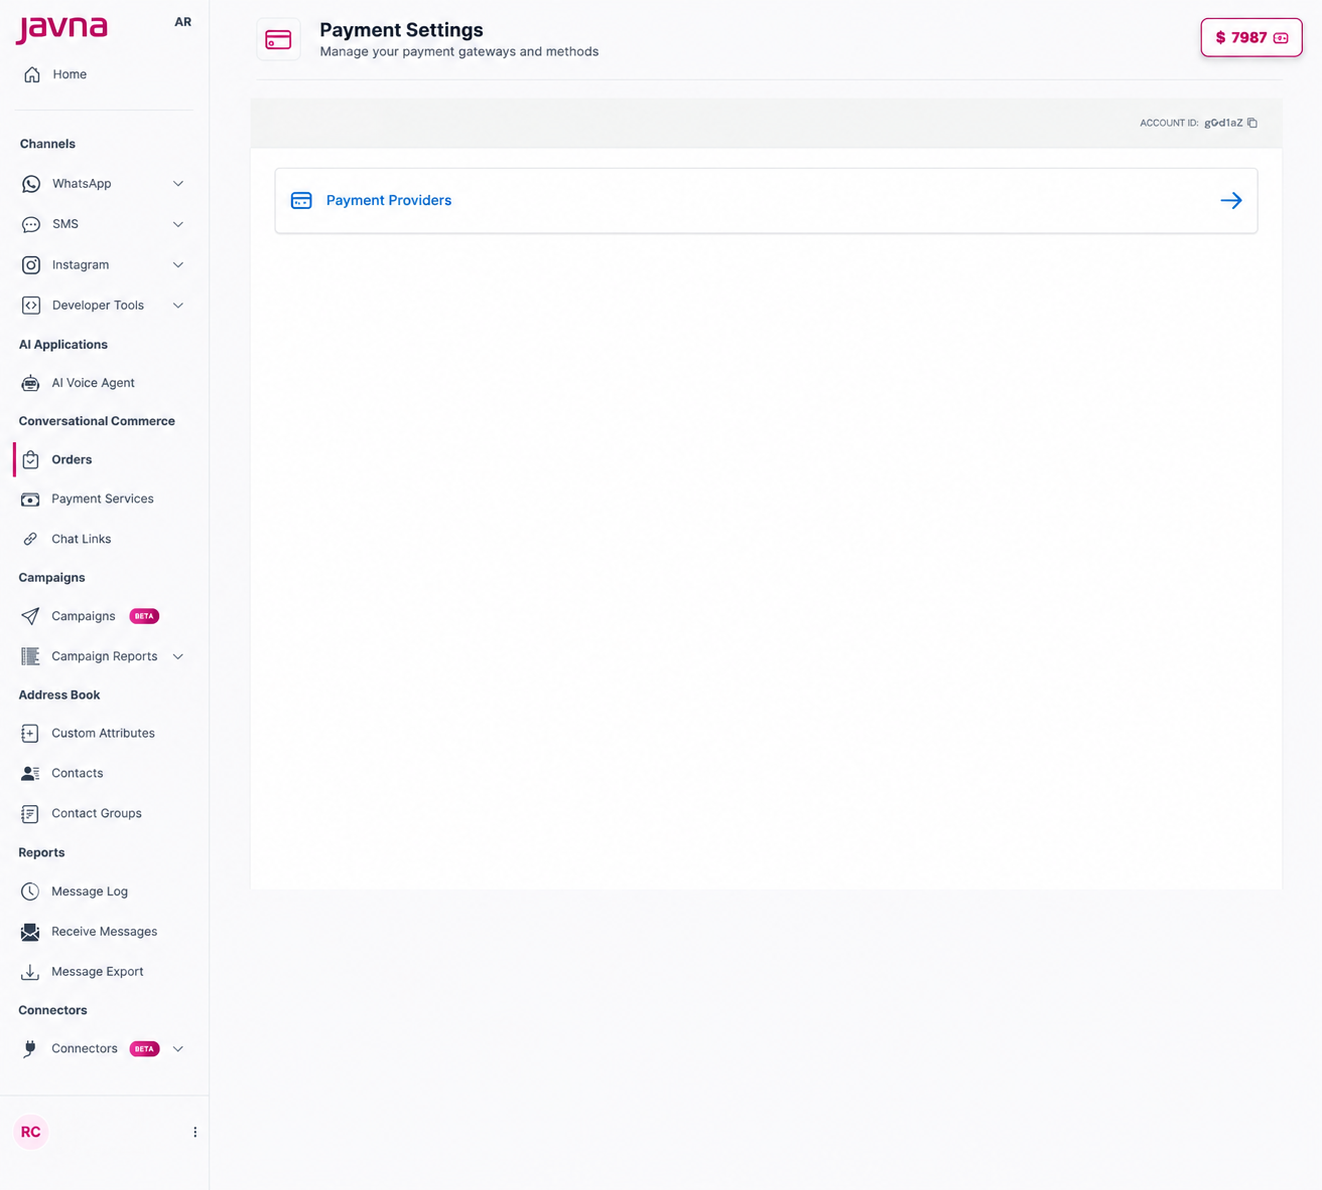
The Payment Settings page
- Click on Payment Providers. You will be redirected to the Connections page, where you can view all connected payment providers.
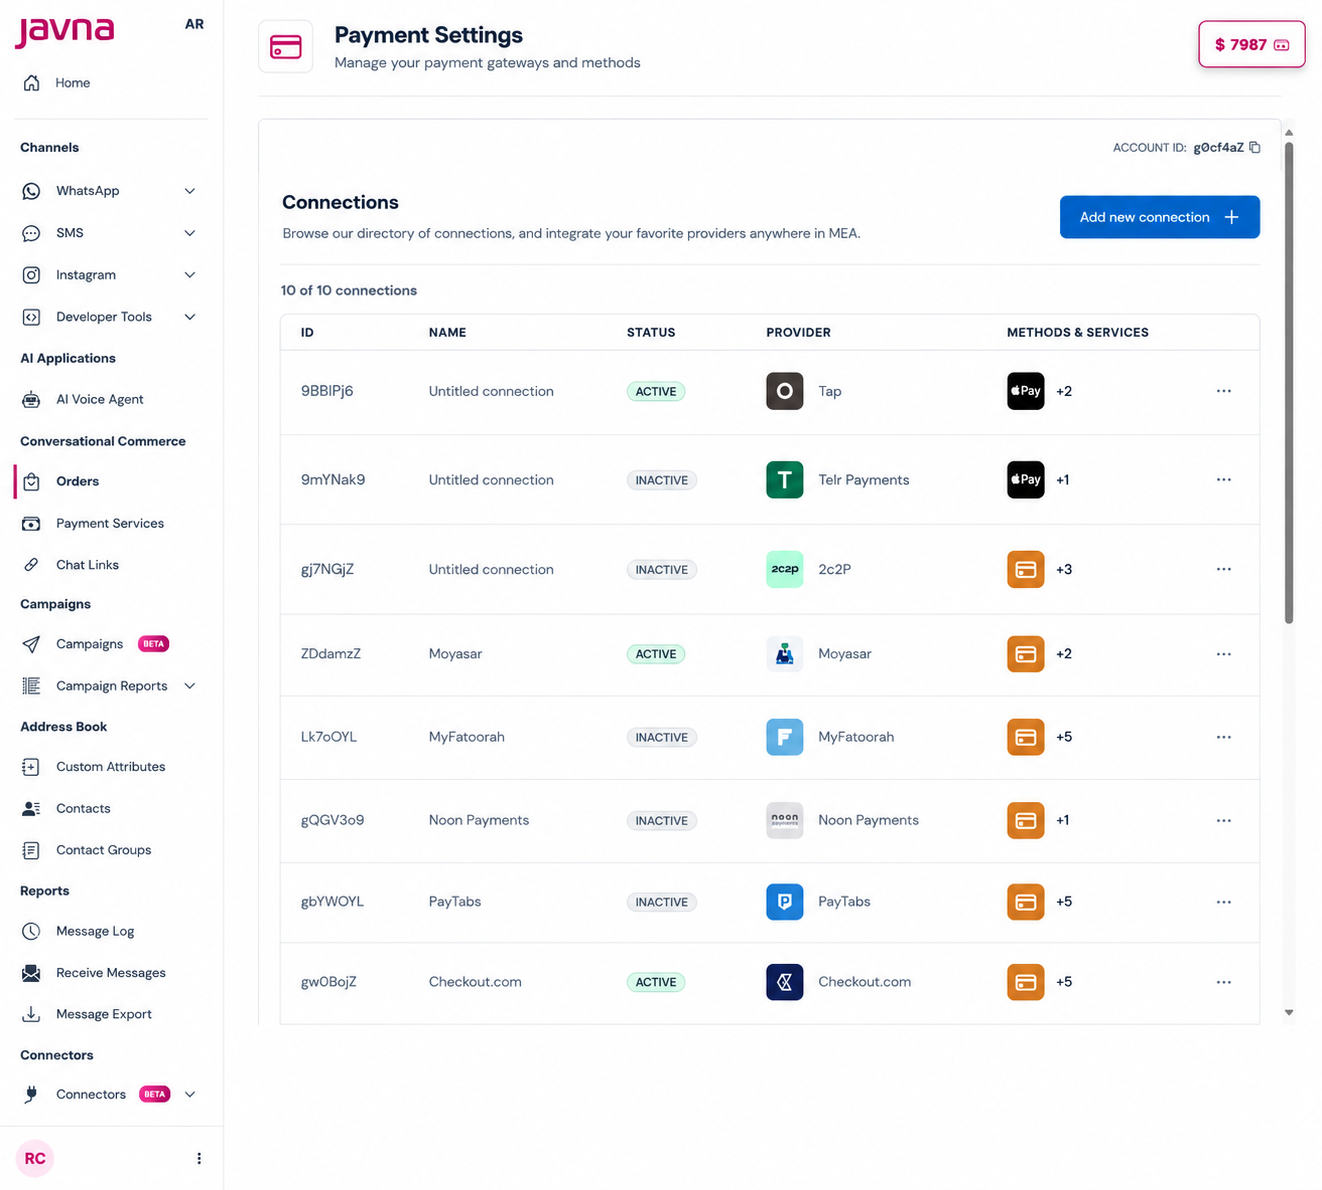
The connections table.
The connections table includes the following details:
| Field | Description |
|---|---|
| ID | Distinguishes one connection from another for tracking and reference |
| Name | The name of the connected payment provider or connection |
| Status | The current connection status, such as Active or Inactive |
| Provider | The payment provider associated with the connection |
| Methods & Services | Available payment methods and services enabled for the connection |
Note: The connections table only appears if you have already connected one or more payment providers. If no providers are connected, the following message will appear: "No connection. Get started by connecting a new provider."
-
Click Add New Connection to view the list of supported payment providers. You can:
- Click Connect next to a provider to connect it.
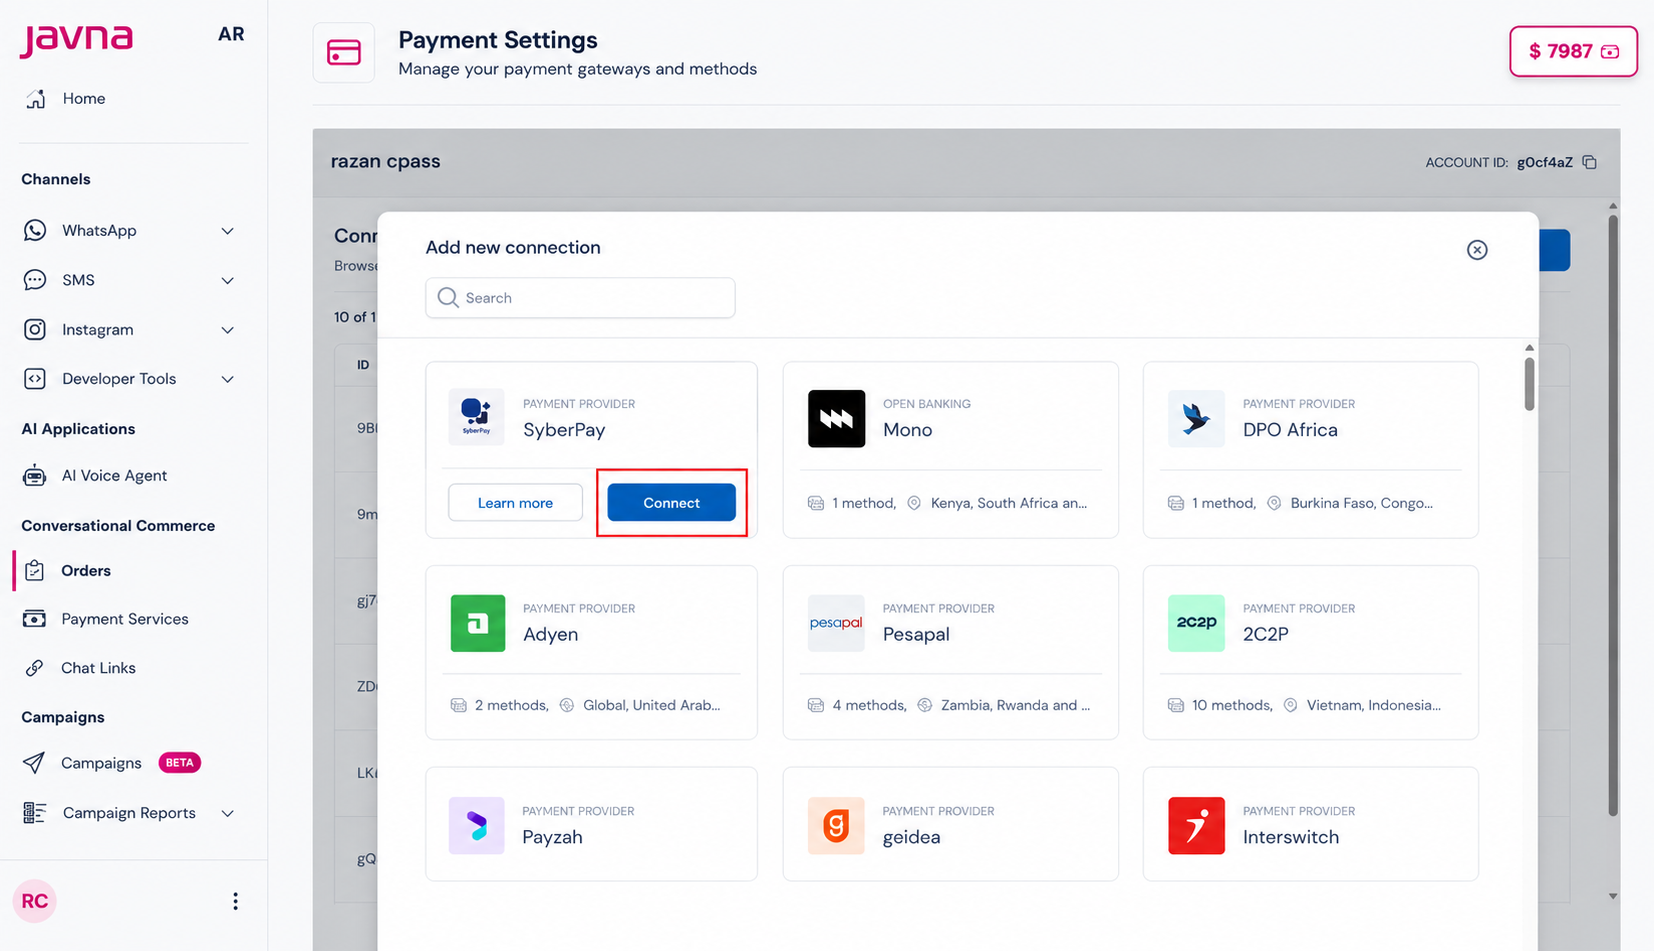
The connect button
- Use the search field to find a specific provider
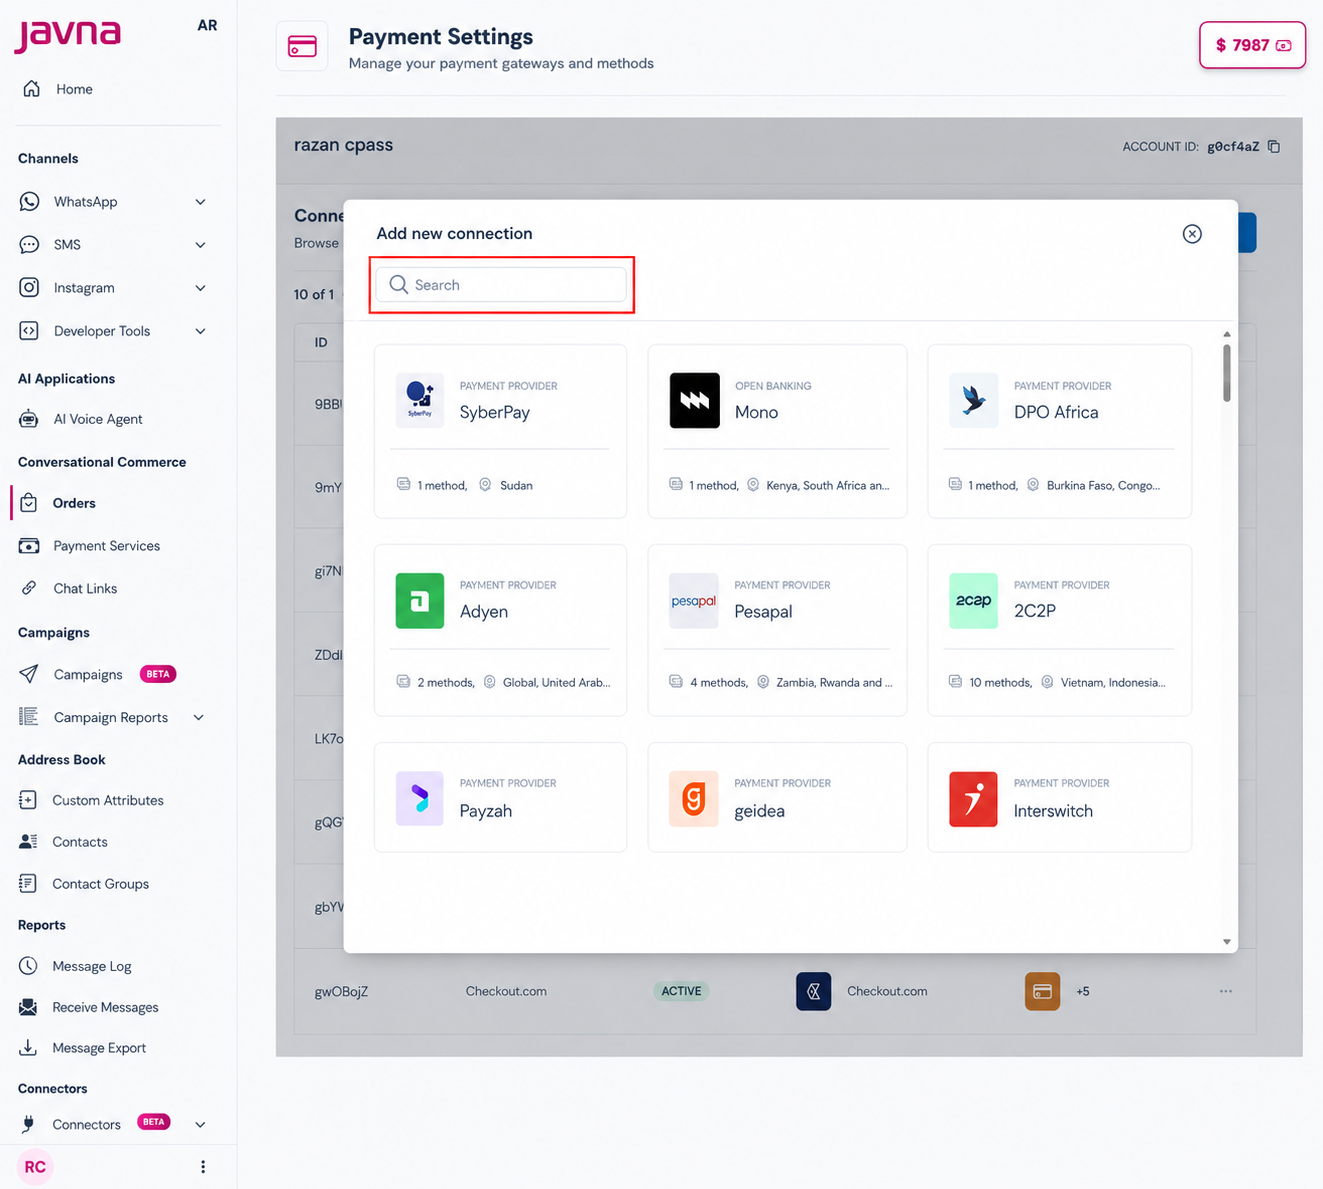
The search field that you can use for searching for a specific provider
- After clicking Connect, complete the provider configuration:
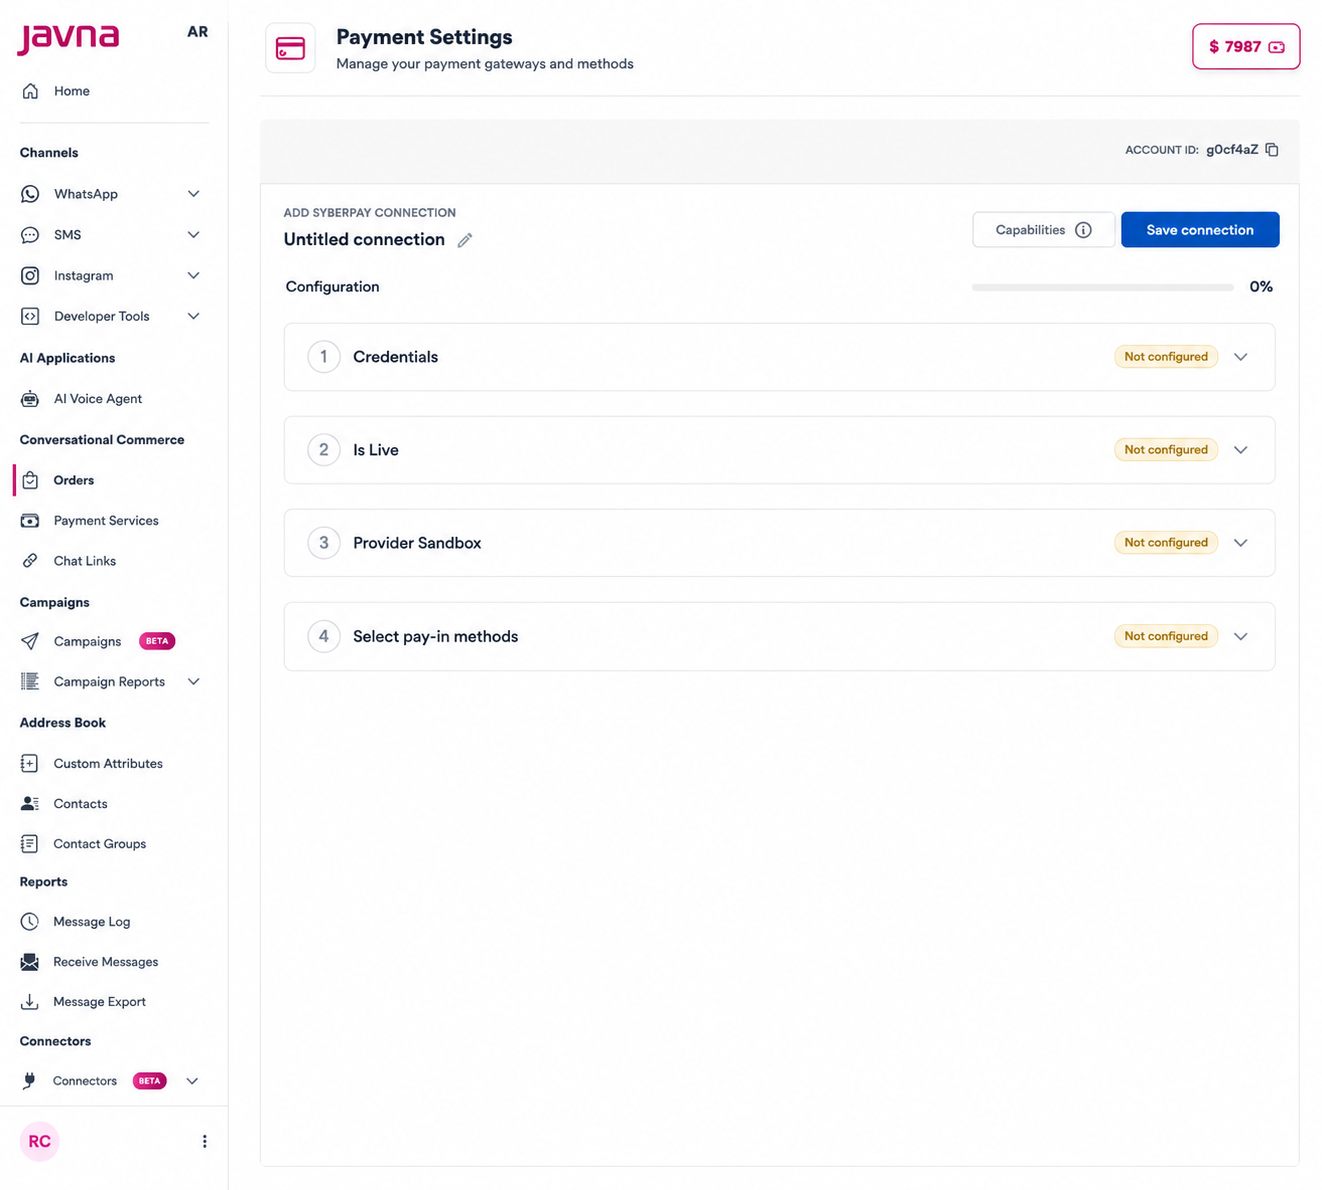
The configuration fields
Note: Configuration fields and requirements may vary depending on the selected payment provider.
a. Enter Provider Credentials Enter the required credentials, then click Save Configuration.
All fields marked with (*) are mandatory.
b. Enable Live Mode The Is Live toggle connects the provider using live API credentials.
- Enabled: Live requests will be sent to the provider
- Disabled: No requests will be sent to the provider
c. Use Provider Sandbox The Use Provider Sandbox toggle determines the provider environment.
- Enable to use the provider's test (sandbox) environment
d. Select Pay-In Methods In the Pay-In Configuration section, enable or disable available payment methods using the toggle switch.
- Some payment methods require additional configurations before they can be used
- At least one pay-in method must be active
After completing the configuration, click Save Configuration.
You can view the capabilities of each connection — such as supported countries, pay-in methods, and pay-out methods — by clicking the Capabilities tab.
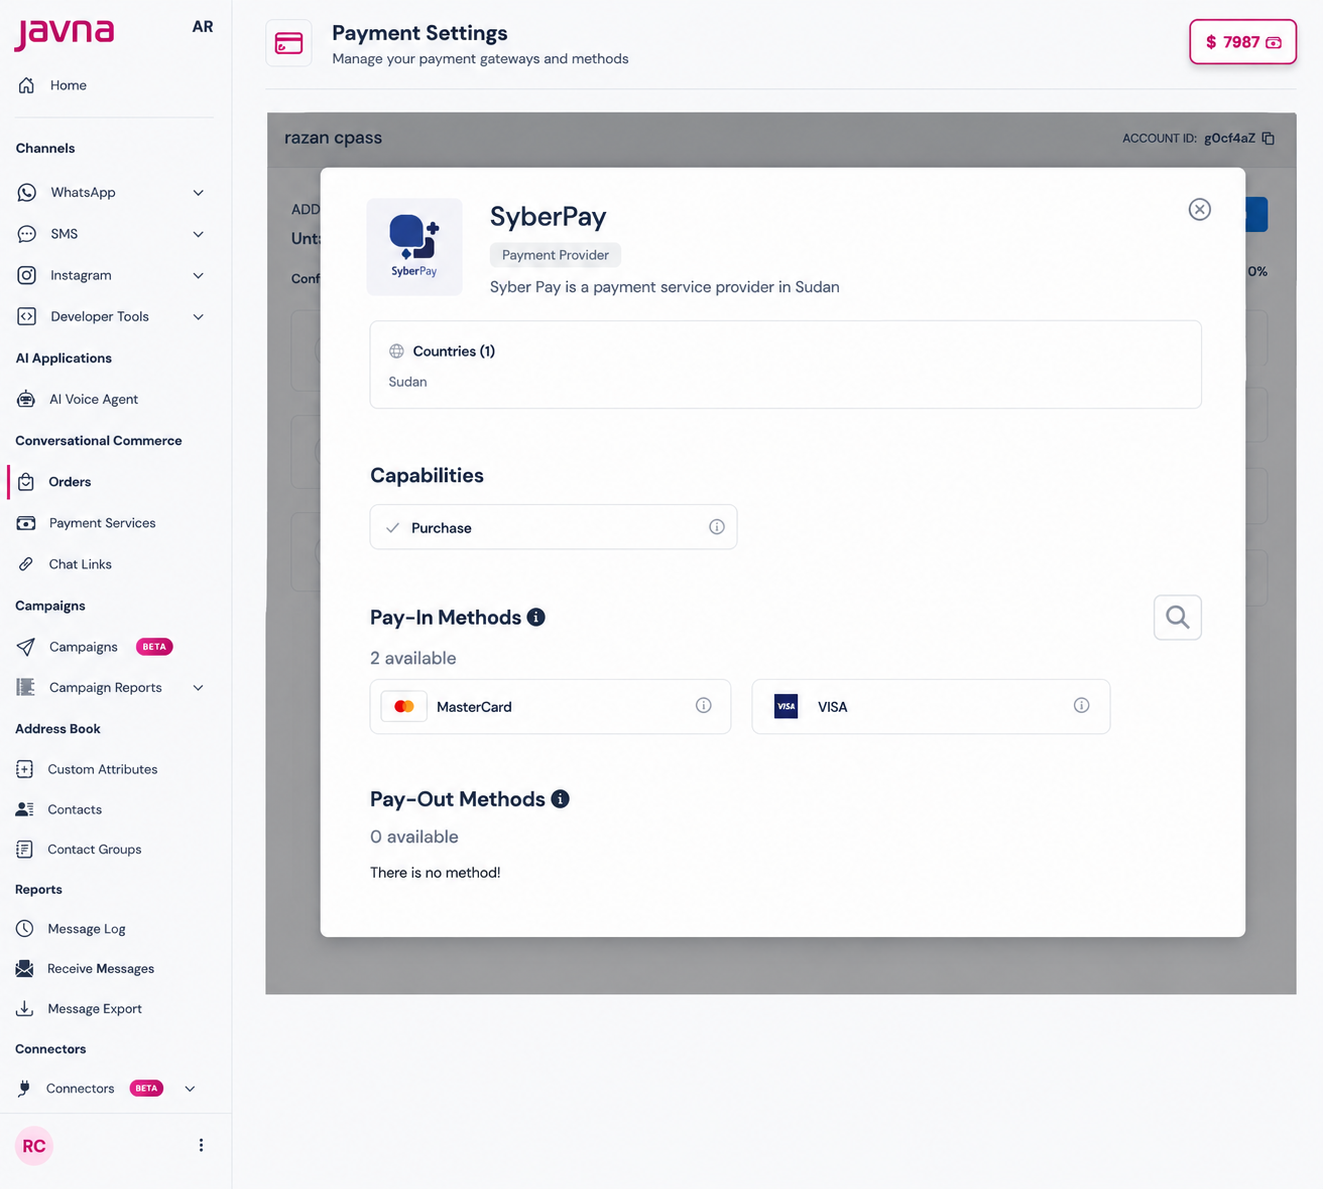
The Capabilities
-
A confirmation message "Connection saved successfully" will appear, and the provider will be listed in the Connections table.
You can manage the connection by clicking the ⋯ (horizontal dots) icon to:
- Deactivate the connection
- Delete the connection
- Copy the connection ID
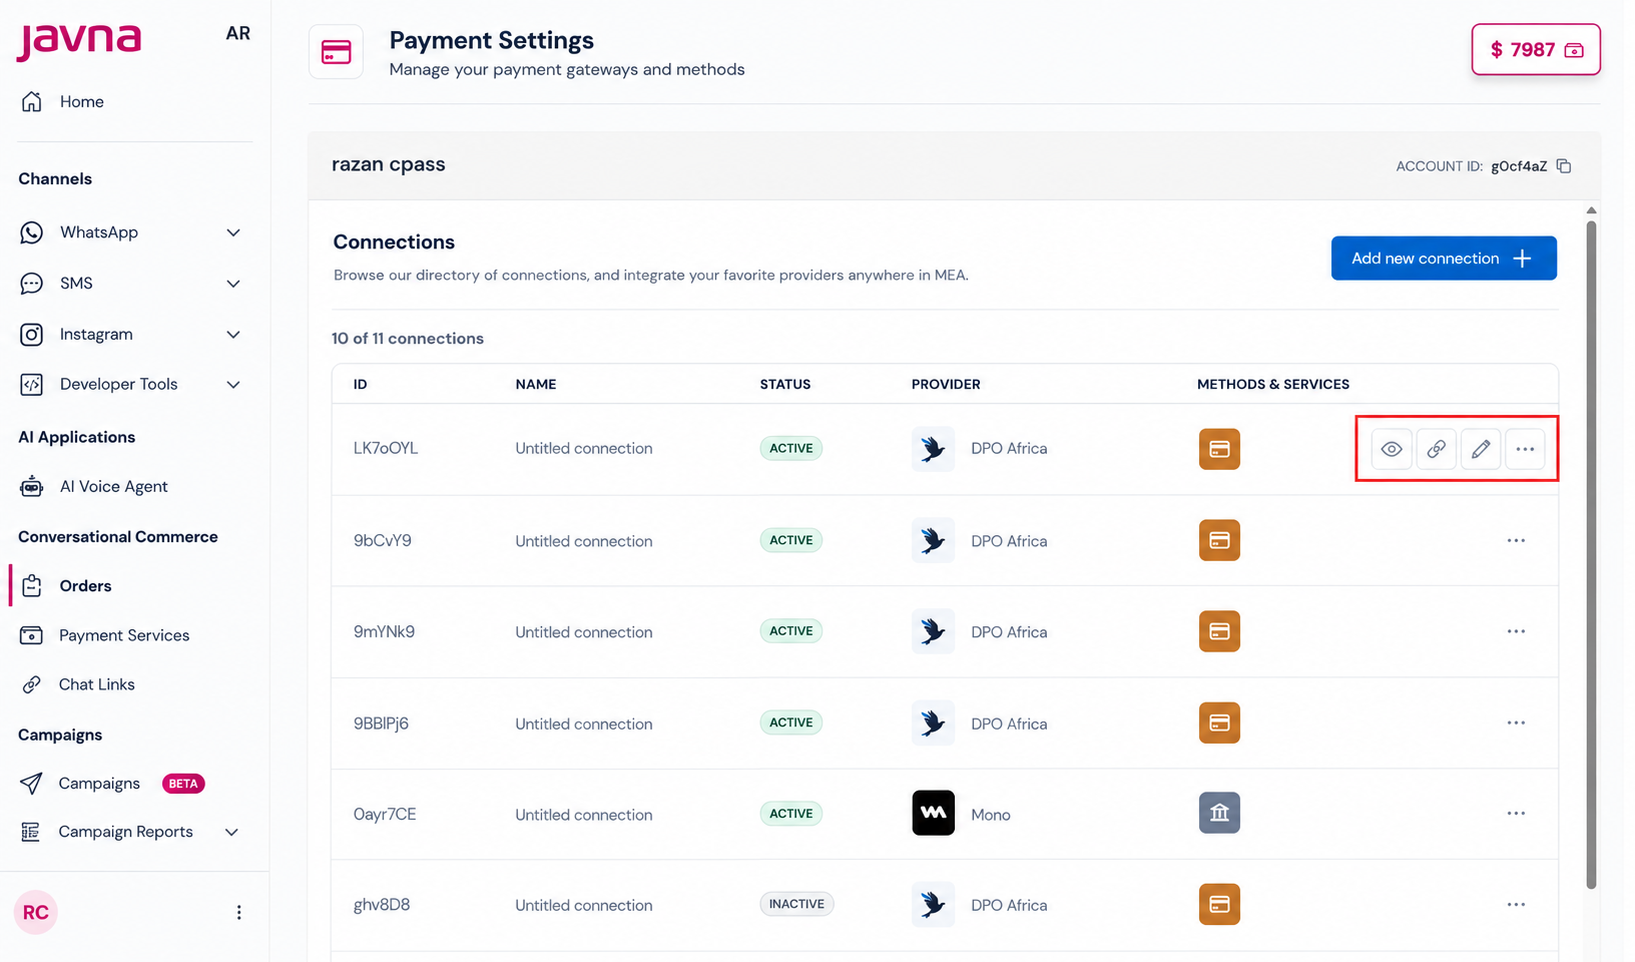
The Actions buttons
Updated 12 days ago