Building Ongoing Campaign
To build your ongoing bot, follow these steps
- Navigate to the “Bot Builder” page.
- Click on the “Build a Bot” button, then Select “Build an Outbound Bot”.
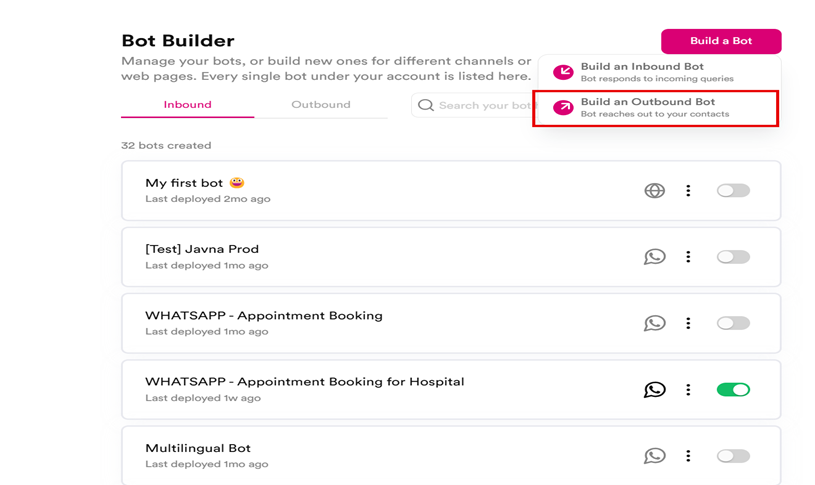
Selecting "Build an Outbound Bot" button.
- Choose the “Ongoing” for your campaign type.
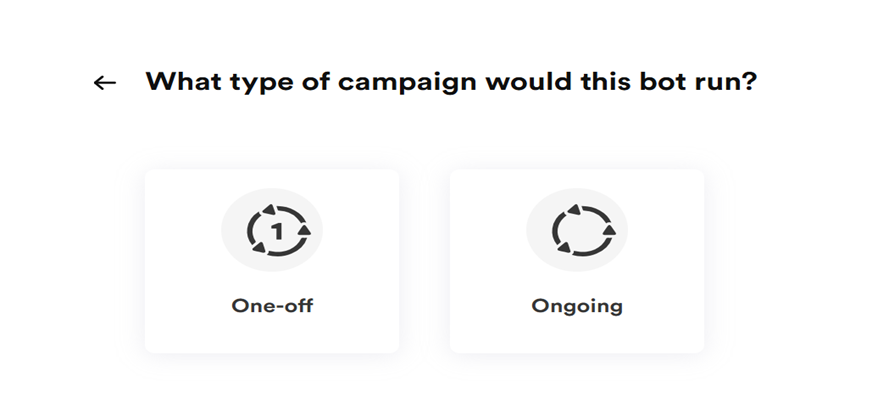
Types of Campaigns that this bot would run.
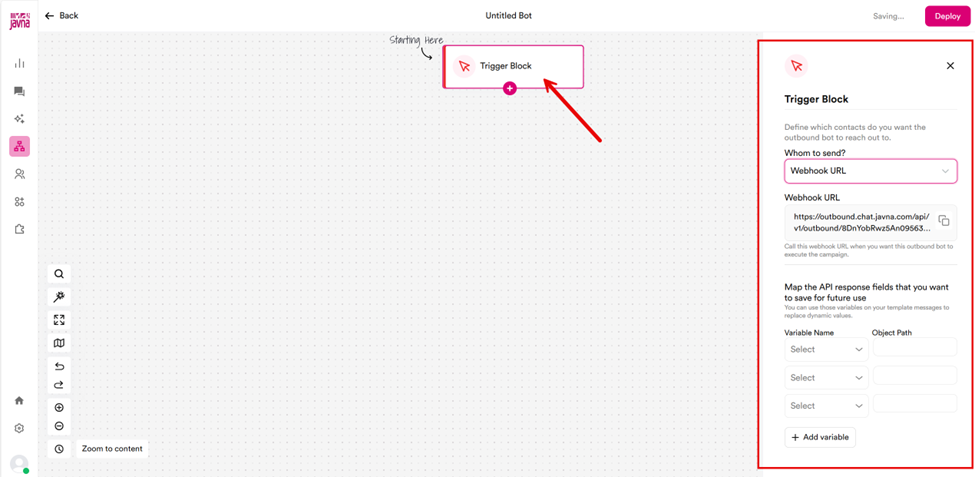
- Click on the “Trigger” action block. A panel will open on the right side of the screen, where you can define which contacts the outbound bot should reach out to by selecting one of the following options from the dropdown menu:

Clicking on the "Trigger" action block.
a. Webhook URL:
i. Call this webhook URL when you want this outbound bot to execute the campaign. You will need the following to trigger this webhook URL:
• Webhook URL - Present on the trigger of the outbound bot.
• Payload - The contact data that you want to send.
Please note that: Maximum limit of contact records is 10,000 contacts in single request.
ii. Map the API response fields to the contact variables you want to save. This allows you to dynamically replace values in your campaign messages. For example, to create a message like "Hello (name), glad we could meet on (date)," make sure to store the name and date fields in your contact mapping.
Please note that it is mandatory to have a phone/email field mapped, in order to be able to send a campaign to contacts.
Clicking on the + icon
b. Choose from a list, if you select this option, you will need to choose a list from the dropdown menu, and then trigger the action by clicking the “Add” or “Remove” buttons.
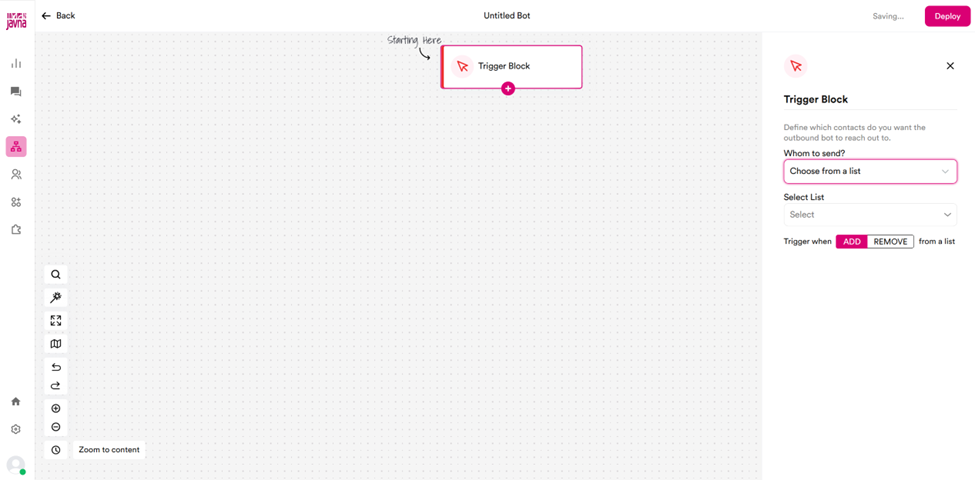
“Choosing from a list” option.
- Click on the plus (+) icon in the "Trigger Block" block to add an action block.
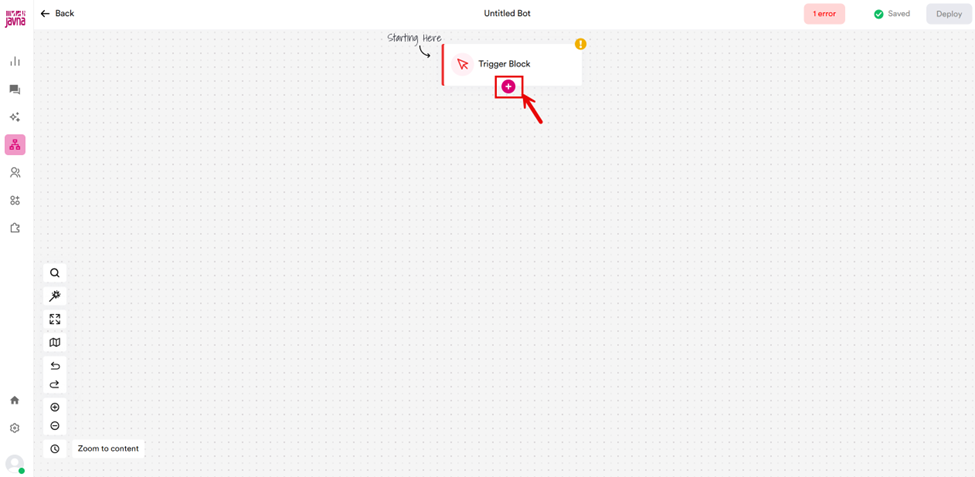
Clicking on "+" icon.
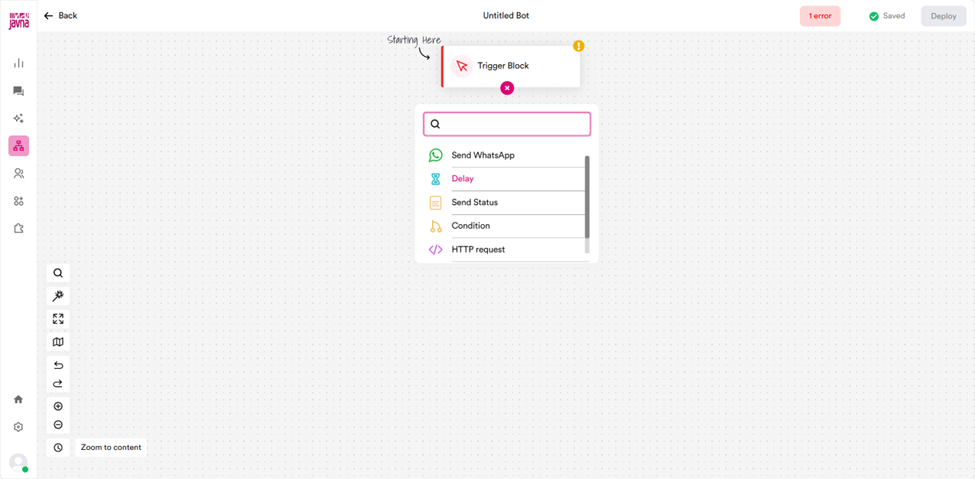
The action blocks.
- Once you have added an action block, click on it to open the right panel, where you can make changes.
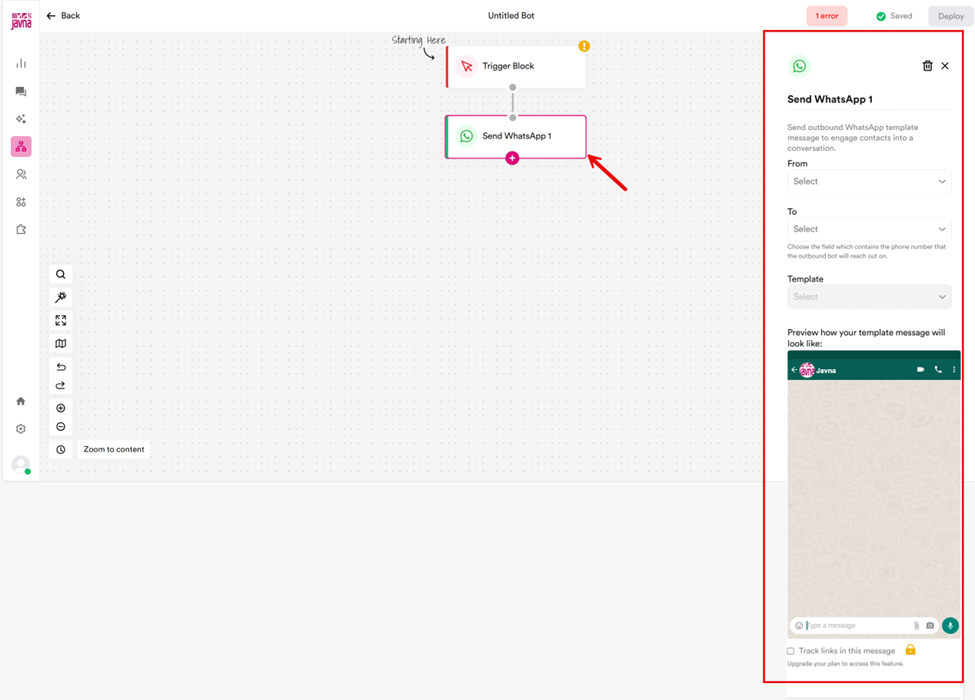
Clicking on the "Action block" to open the right panel.
- Once your flow has been created, double-check all the messages for typos or any other mistakes, then click on the "Deploy" button, A confirmation prompt will be shown to you for final approval before launching the campaign.
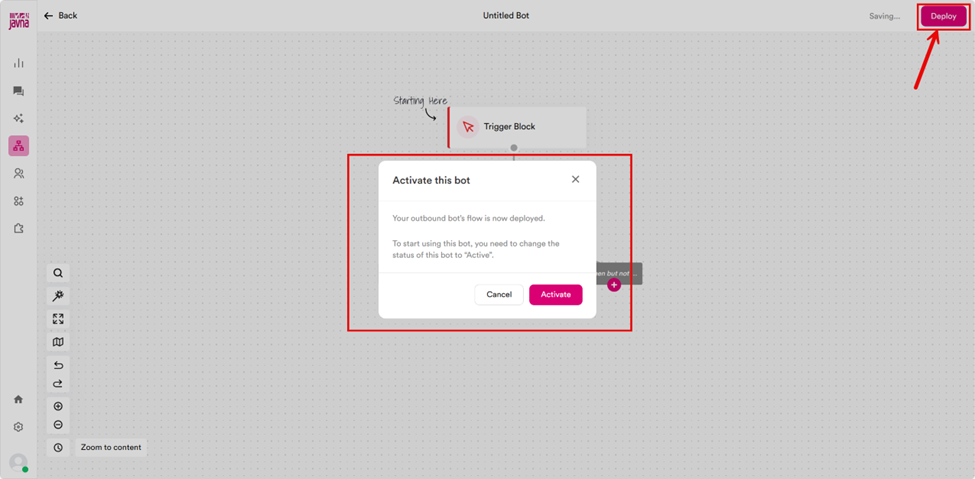
Clicking on the "Deploy" button and the confirmation message will be appearing.
Note: You can turn off your outbound bot, if you do not want to accept any new requests.

The bot is turning on.
- You will be able to see the results of the campaign by clicking on the numbers to go to a deeper view and be able to download a CSV file which will contain the results of the campaign on a per contact basis.

Results of a campaign
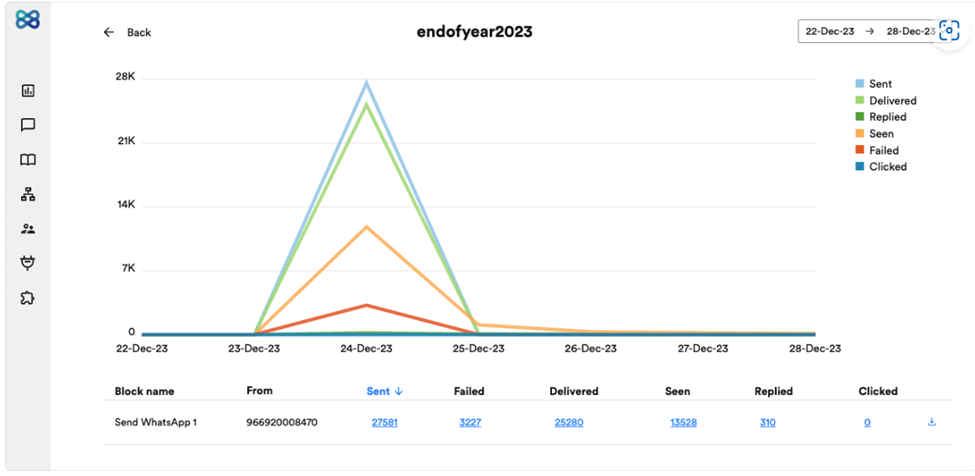
Detailed view of campaign analytics
Status fields you will see are as follows:
- Sent: The contact has been sent the message
- Failed: The message was undeliverable to the contact.
- Delivered: The message was delivered to the contact.
- Seen: The message was seen by the contact (Only on WhatsApp).
- Replied: The message was replied back by the contact.
- Clicked: The message had a link which was clicked (Only on Email)