Creating inbound chatbot
An inbound chatbot is designed to interact with customers when they initiate a conversation with your business through a supported communication channel. It can automatically respond to customer messages, collect information, guide users through predefined conversation flows, and perform automated actions based on the configured bot logic.
You can follow these steps to build an inbound chatbot:
- Navigate to the “Bot Builder” page. refer to (navigating to the bot builder page) for more details.
- Click on the “Build a Bot” button, then Select “Build an Inbound Bot”.
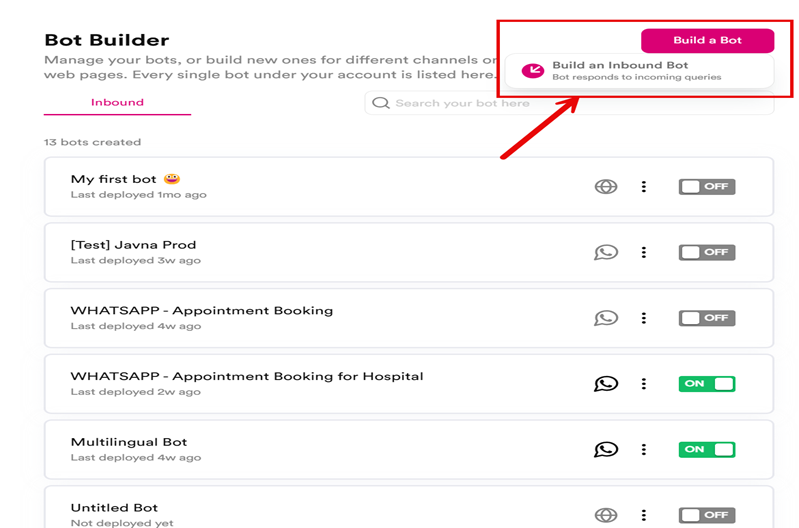
The "Build a bot" button
- Choose a “Channel” from the available options
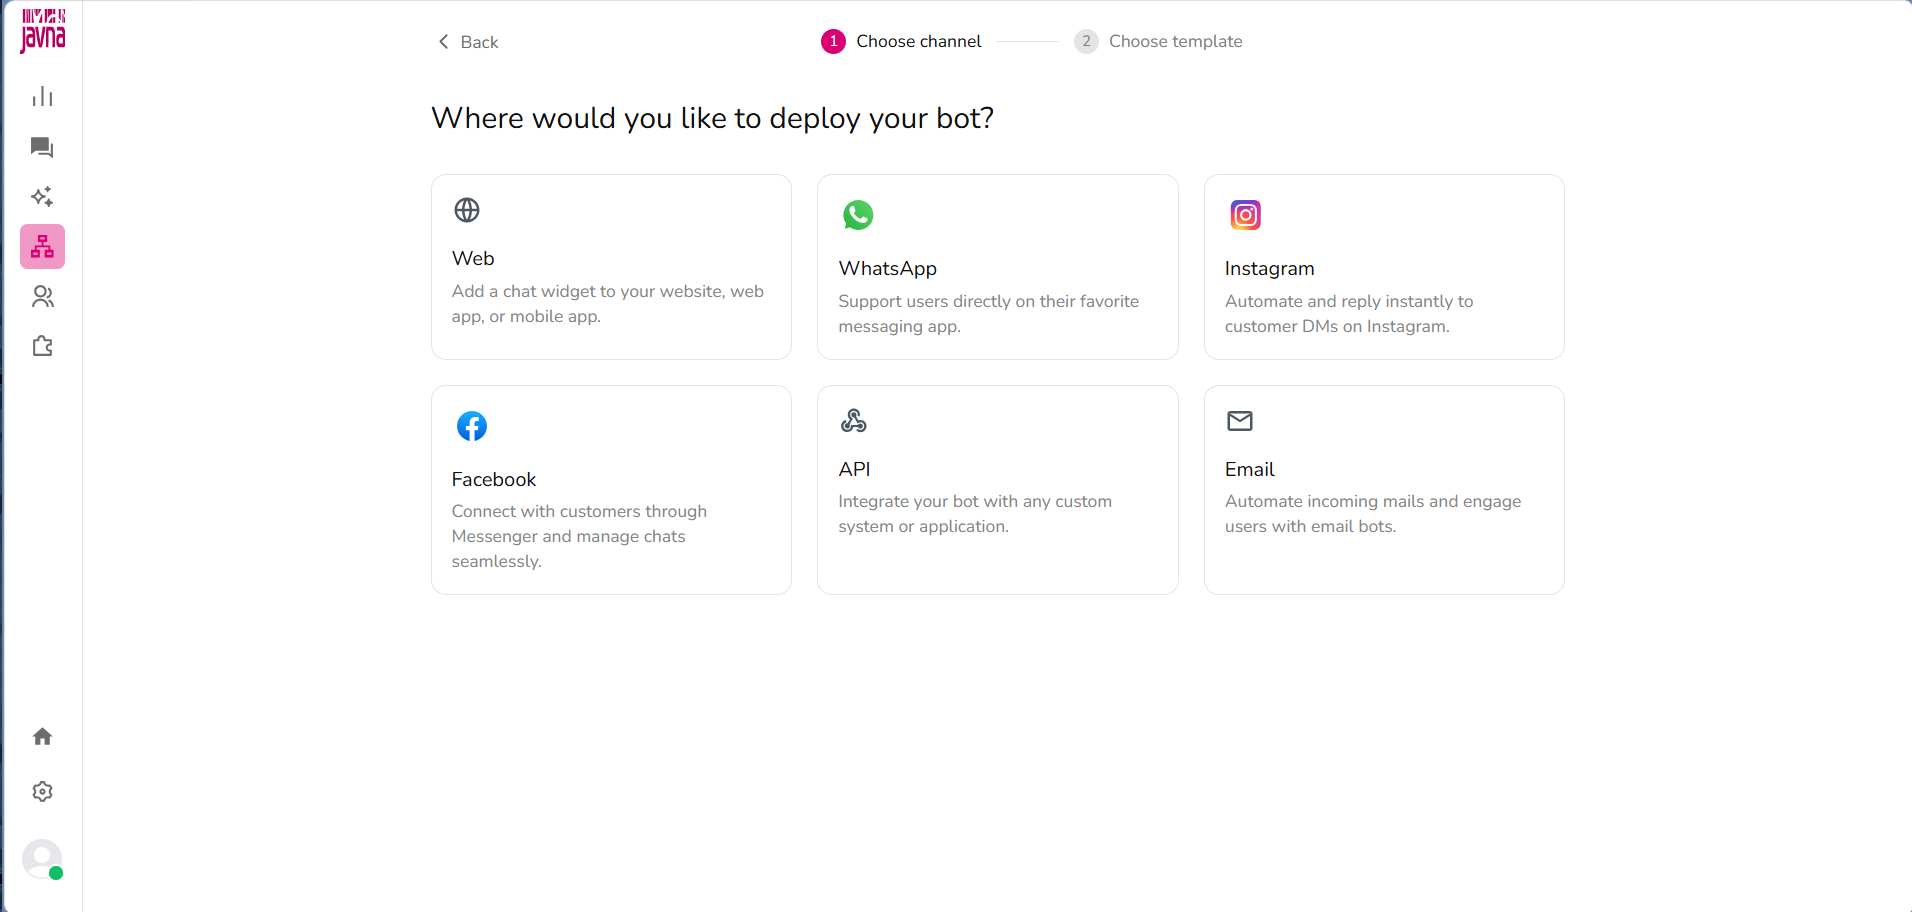
Choosing channel from the available options
- You can choose how to build your bot by either:
a. Clicking on the button “Build from scratch”.
b. Select any of the available templates and then click on the “Use This Template” button.
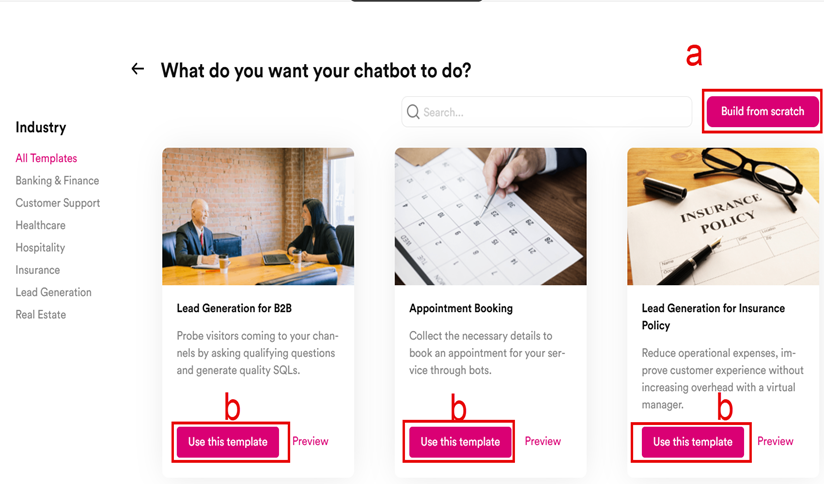
The "Build from scratch" and "Use this template" buttons.
- If you select a template, you can customize the bot's responses and behaviors by editing the existing Action Blocks. To do this, click on the Action Block you want to edit, and the right panel will appear, allowing you to make changes.

one of the templates that you could use.
- If you choose to build your bot from scratch, you have to add Action Blocks to your conversational flow to define how the bot interacts with customers by following these simple steps:
a. Click on the "Bot is triggered if" block. A panel will open on the right side of the screen, where you must Select the WhatsApp number associated with the bot. You may optionally configure additional trigger settings.
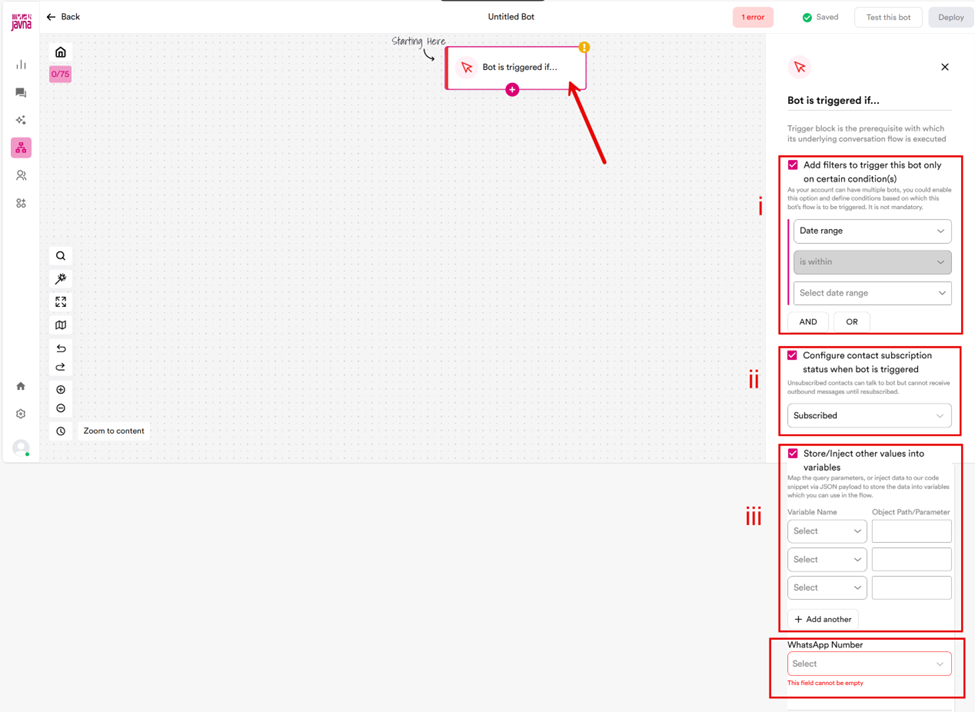
The options that will be appearing in the right-side menu after clicking on the " Bot is triggered if " Block.
i. Check the box to Add filters to trigger the bot based on certain conditions. Once checked, a dropdown menu will appear with options like:
•Date range: Choose the desired date range
.•Keyword: Set "equals to" or "not equals to," then enter the value in the text field.
•Button Payload: Set "equals to" or "not equals to," then enter the value in the text field.
Note: Use the "and" button to require all conditions to be met, or the "or" button to allow any one condition to trigger the bot.
ii. Check the box for "Configure contact subscription status when the bot is triggered." Then choose either Subscribed or Unsubscribed from the dropdown menu.
Note: Unsubscribed contacts can interact with the bot but will not receive outbound messages until they re-subscribe.
iii. Check the box for “Store/Inject values into variables” to map query parameters or use a JSON payload. Then, select a Variable Name and enter the Object Path/Parameter.
b. Click on the plus (+) icon in the "Bot is triggered if" block to add an action block.
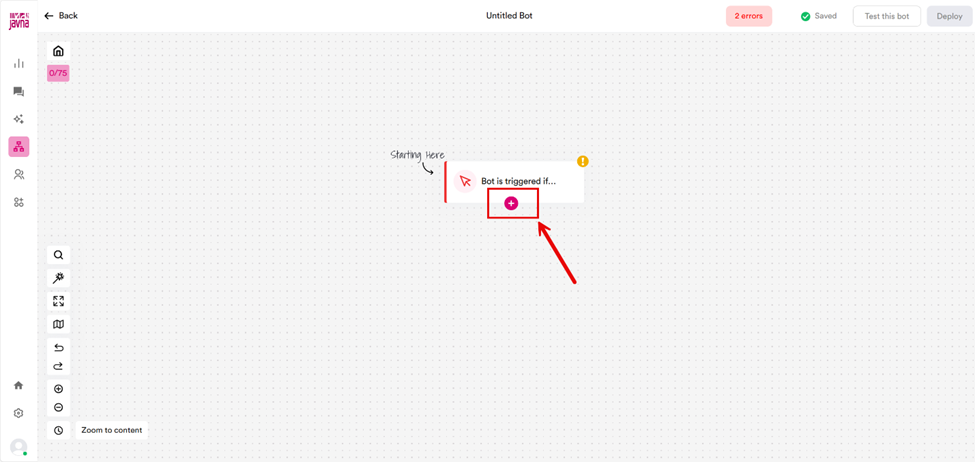
the plus (+) icon in the "Bot is triggered if" block
To learn more about the available action blocks, refer to section (the available action blocks in inbound chatbots)
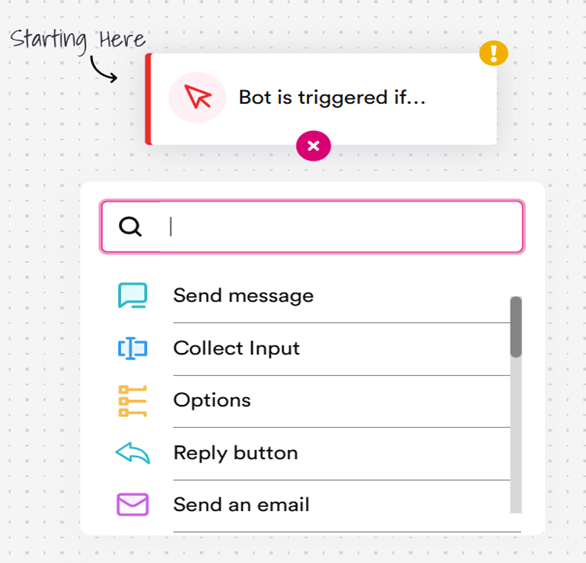
The Actions blocks
c. Once you have added an action block, click on it to open the right panel, where you can make changes.
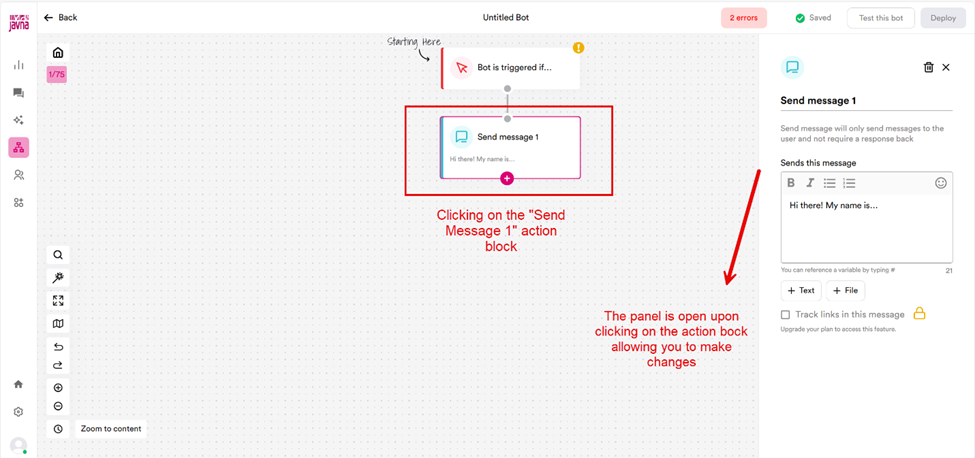
Clicking on the action block to open a right panel for making your changes.
d. Now, you can repeat these steps to add additional Action Blocks as needed. Make sure that all Action Blocks are properly connected to ensure smooth and seamless conversations between the bot and your customers.
- Click on the “Test this Bot” button. A new window will open, allowing you to test the flow of the bot you’ve created, unless there are any errors.
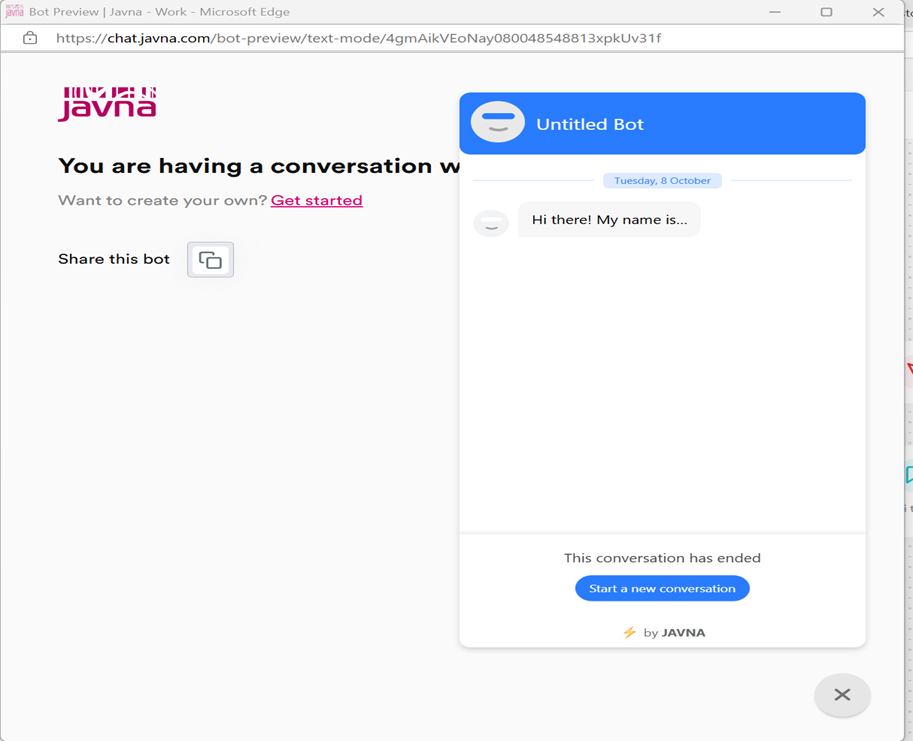
A new window will open to test the flow of the bot.
- If there are any errors, you must resolve them before continuing, as testing and deploying the bot will be deactivated until they are fixed. You can find the specific error by clicking on "Error", which will provide an explanation to help you address the issue.
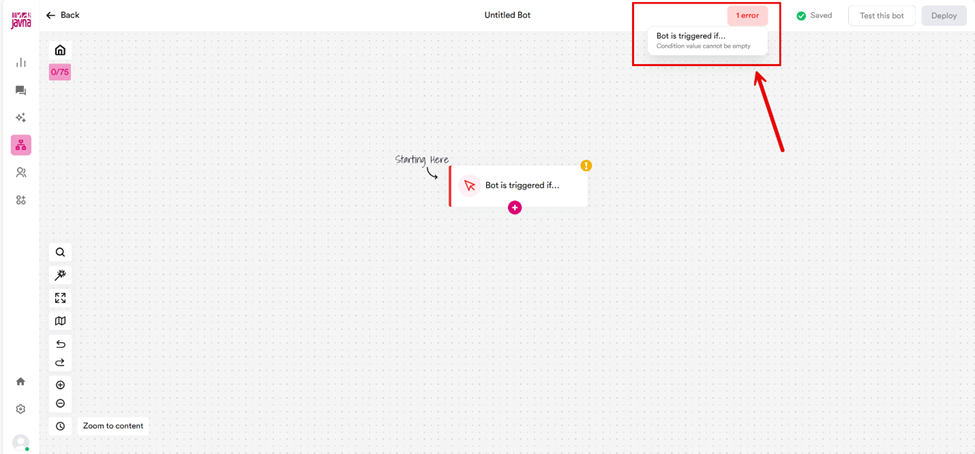
The error that is appearing when clicking on the "Error" button
- The final step is to launch your bot. Click on the “Deploy” button to add it to the “Bot” list.
- Activate the created bot by switching the On/Off toggle next to it in the list.
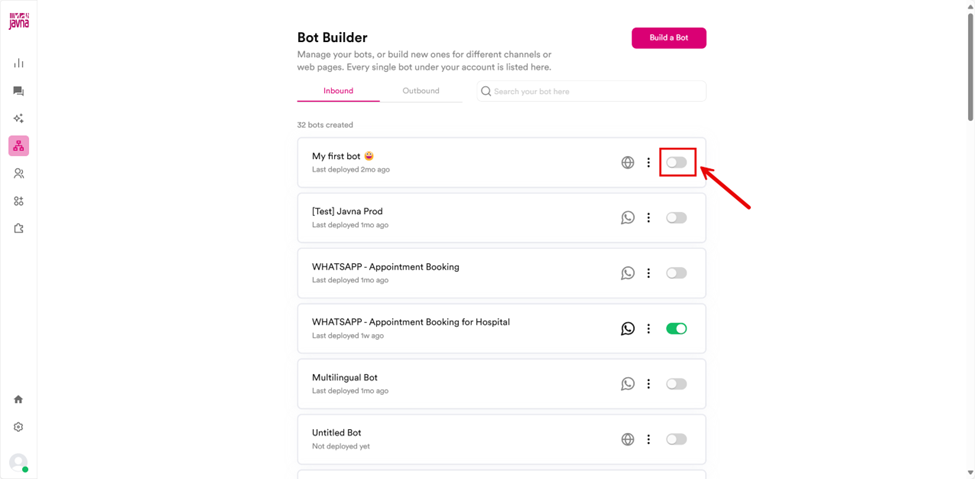
Switching the On/Off toggle in the list.
.