Creating Custom Attributes
To create custom attributes. follow these steps:
- Click on the "Create custom attribute" button, A pop-up window will appear.
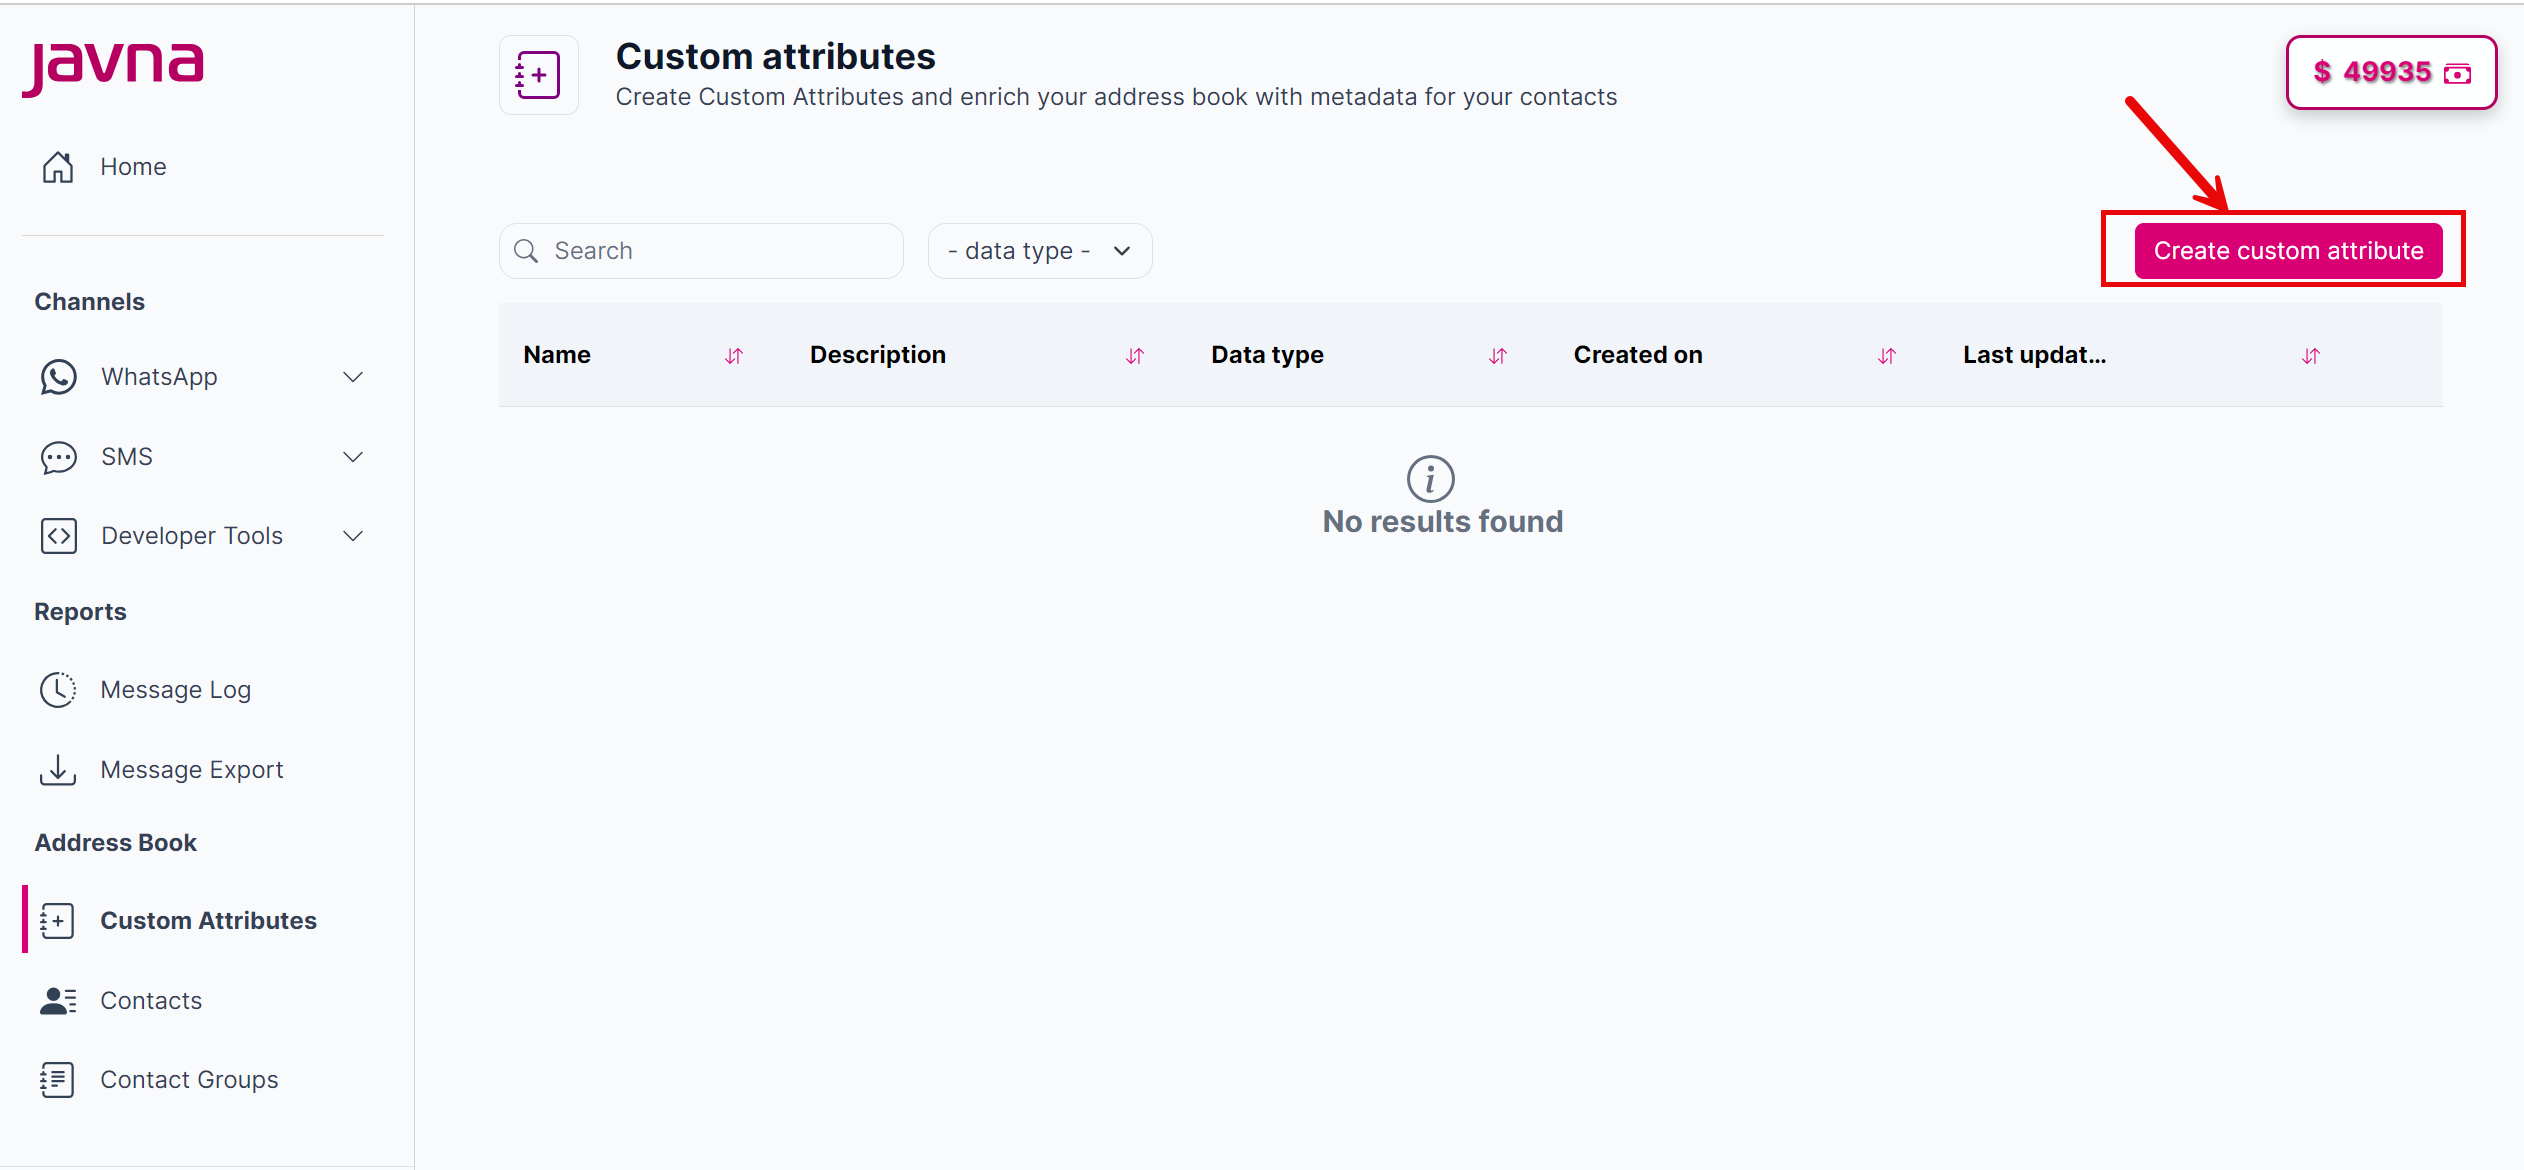
The "create custom attribute" button.
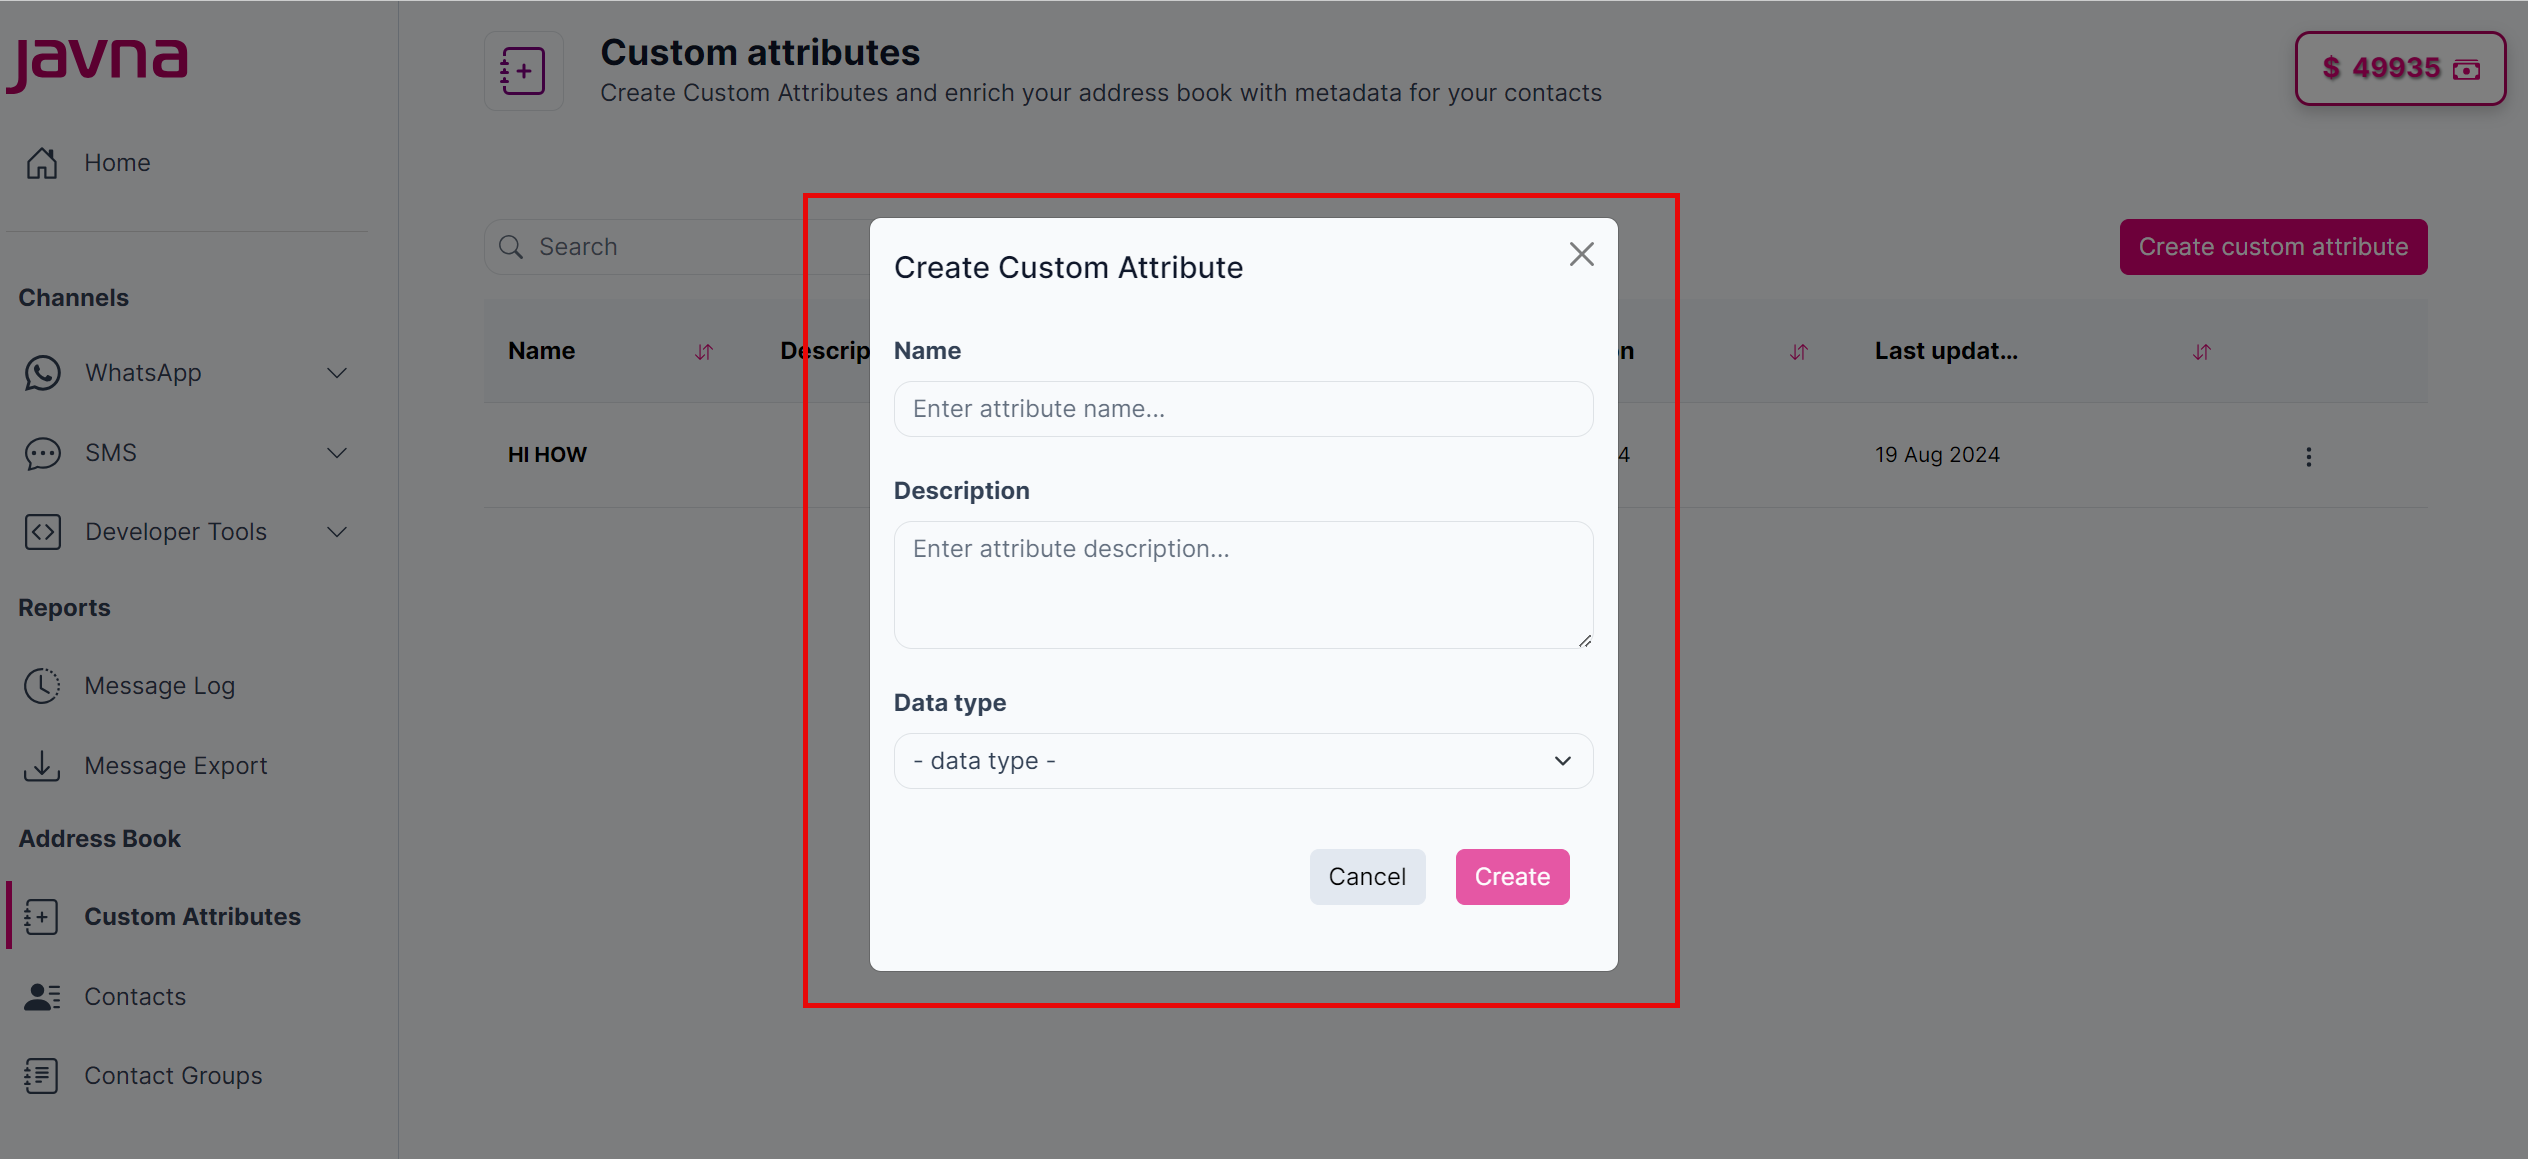
The "Create Custom Attribute" pop up.
- Enter the attribute name.
- Enter the attribute description.
- Select one of these data types:
- Text: This type allows you to store any kind of text or characters, such as names, addresses, or notes.
- Number: This type is used to store numerical values, which can be used for quantities, measurements, or any other numeric data.
- Date: This type allows you to store dates, such as birthdates, appointment dates, or any relevant calendar dates.
- Bit: This type is used for binary values, often representing yes/no or true/false options.
- Click on the "Create" button to save the attribute or click on the "Cancel" button if you want to discard any changes.
Note: Each Customer Attribute must have a unique name.